Oh my goodness, let me tell you about my love for Kielbasa Pierogi Bake! This dish is like a warm hug on a plate, filled with those delightful dumplings that are just bursting with savory kielbasa and gooey cheese. Growing up, my grandma would whip this up on chilly Sunday afternoons, and the aroma wafting through the house was simply irresistible. The crispy edges of the pierogi paired with the smoky flavor of the kielbasa make for a heavenly combination that’s hard to resist. Plus, it’s super easy to make, which is a win-win in my book! Trust me, once you take that first bite, you’ll be transported straight to Poland, feeling all the cozy vibes. So, let’s dive into this comforting classic that’s sure to become a favorite in your home too!
Ingredients for Kielbasa Pierogi Bake
1 package pierogi (16 oz) – these little dumplings are the star of the show!
1 lb kielbasa, sliced – go for the smoked variety for that delicious flavor.
1 cup shredded cheddar cheese – I love sharp cheddar for an extra kick!
1 medium onion, diced – this adds such a nice sweetness when cooked.
2 tablespoons olive oil – just enough to sauté the onion and kielbasa.
1 teaspoon garlic powder – because garlic makes everything better!
Salt and pepper to taste – don’t be shy with these seasonings!
How to Prepare Kielbasa Pierogi Bake
Preheat the Oven
First things first, you’ll want to preheat your oven to 375°F (190°C). This step is super important because it ensures that your Kielbasa Pierogi Bake cooks evenly and gets that lovely golden brown top. Trust me, you don’t want to skip this part!
Cook the Onion and Kielbasa
While the oven is heating up, grab a skillet and add 2 tablespoons of olive oil over medium heat. Once it’s nice and warm, toss in your diced onion. Sauté it for about 3-4 minutes until it’s softened and slightly translucent. Then, it’s time to add in the sliced kielbasa. Cook it for another 5-7 minutes, stirring occasionally, until the kielbasa is browned and crispy. Oh, the smell at this point is just heavenly!
Now, let’s build this delicious masterpiece! In a baking dish, start by layering half of your pierogi on the bottom. Next, spoon in that wonderful kielbasa and onion mixture, followed by half of the shredded cheddar cheese. Repeat with the remaining pierogi and top it all off with the rest of the cheese. Don’t forget to sprinkle that garlic powder, salt, and pepper evenly over the top—this is where the magic happens!
Baking the Dish
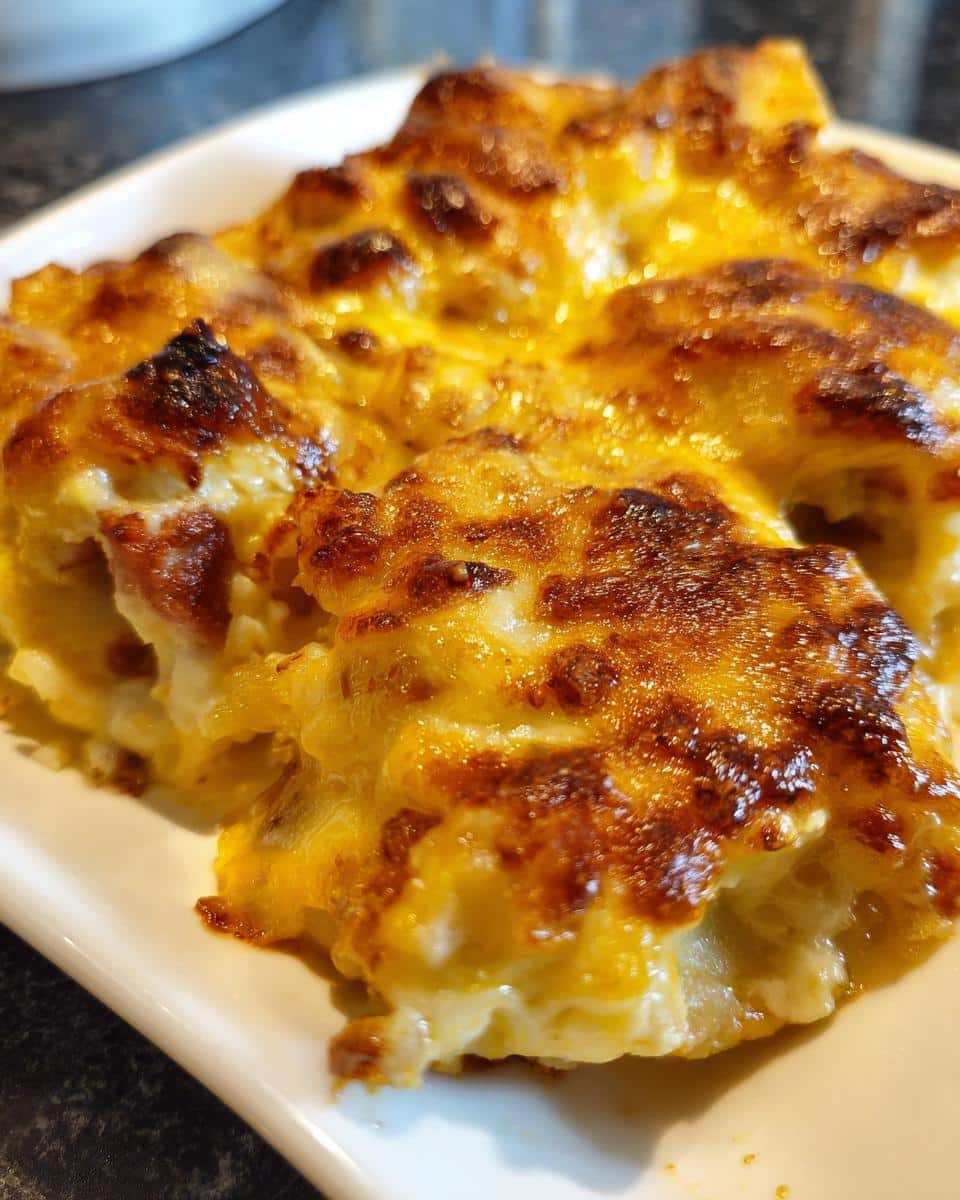
Pop your baking dish into the preheated oven and let it bake for about 25-30 minutes. You’ll know it’s ready when the cheese is melted and bubbly, and the edges of the pierogi are slightly crispy. Just wait until you see that golden goodness—it’s absolutely mouthwatering!
Nutritional Information
Now, let’s chat about the nutritional side of things! While I always say to enjoy everything in moderation, it’s good to know what you’re getting when you dig into this delicious Kielbasa Pierogi Bake. Here’s a rough estimate of the nutritional values per serving:
Calories: 350
Fat: 20g
Saturated Fat: 8g
Unsaturated Fat: 10g
Trans Fat: 0g
Cholesterol: 50mg
Sodium: 800mg
Carbohydrates: 30g
Fiber: 2g
Protein: 15g
Sugar: 1g
Keep in mind, these values are estimates and can vary based on specific brands and ingredients you use. It’s all about finding that balance and enjoying the comfort of this amazing dish!
Tips for Success
Choose Quality Ingredients: Opt for high-quality kielbasa and fresh pierogi for the best flavor. It truly makes a difference!
Don’t Overcrowd the Skillet: If your skillet is too full, the kielbasa and onions won’t brown properly. Cook in batches if needed!
Experiment with Cheeses: While cheddar is fantastic, you can try mozzarella, gouda, or even a spicy pepper jack for a twist!
Cover with Foil: If you find the top is browning too quickly, cover the dish with aluminum foil for the first 15 minutes of baking.
Serve with Toppings: A dollop of sour cream or a sprinkle of fresh herbs like parsley or chives adds a lovely freshness!
Let It Rest: After baking, let your Kielbasa Pierogi Bake sit for about 5 minutes before serving. This helps everything set up a bit!
Variations to Try
If you’re feeling adventurous, there are so many fun ways to switch up your Kielbasa Pierogi Bake! Here are a few ideas that I absolutely love:
Cheese Swap: While cheddar is my go-to, feel free to mix it up! Try mozzarella for a gooey stretch or gouda for a smoky flavor. You could even toss in some pepper jack for a spicy kick!
Add Vegetables: Sneak in some veggies for extra flavor and nutrition! Sautéed spinach, bell peppers, or mushrooms can be great additions. Just cook them down with the onion for a delicious boost.
Herb Infusion: Sprinkle in some fresh herbs like thyme, dill, or parsley between the layers for a burst of freshness. It really elevates the dish!
Different Meats: Swap out the kielbasa for another type of sausage, like Italian or chorizo, for a different flavor profile. Each will bring its unique twist to the dish.
Spicy Twist: Mix in some diced jalapeños or a dash of hot sauce to the kielbasa and onion mixture for those who love a little heat!
These variations keep things exciting and let you put your own spin on this comforting classic. Don’t be afraid to experiment—cooking is all about making it your own!
Serving Suggestions
Now that your Kielbasa Pierogi Bake is ready to shine, let’s talk about what to serve alongside this comforting dish! Here are some simple and delicious ideas that will complement those savory flavors perfectly:
Sour Cream: A dollop of cool, creamy sour cream is a must! It adds a tangy contrast that balances the richness of the bake.
Fresh Salad: A crisp green salad with a light vinaigrette is a great way to add some freshness to the table. It helps to cut through the hearty richness of the pierogi.
Steamed Vegetables: Think some vibrant steamed broccoli or green beans. They’re quick to whip up and add a nice pop of color and nutrition!
Apple Sauce: This might sound a bit unconventional, but a side of sweet apple sauce pairs beautifully with the savory kielbasa, adding a delightful contrast.
Crusty Bread: A slice of warm, crusty bread or a soft roll is perfect for soaking up any cheesy goodness left on your plate. Yum!
These sides are not only easy to prepare but also add a lovely touch to your meal. So gather your loved ones around the table, serve up this hearty bake, and enjoy the comforting flavors together!
Storage & Reheating Instructions
Let’s talk about how to keep that delicious Kielbasa Pierogi Bake for later! First off, if you have any leftovers (which is always a win!), you’ll want to store them properly to maintain that mouthwatering flavor and texture. Here’s how I do it:
Cool Before Storing: Allow your Kielbasa Pierogi Bake to cool down to room temperature before you store it. This helps prevent condensation, which can make it soggy!
Airtight Container: Transfer any leftovers into an airtight container. This keeps the dish fresh and prevents it from absorbing other odors in the fridge.
Refrigeration: Your delicious bake can be stored in the refrigerator for up to three days. Just make sure to enjoy it before then, as it’s best fresh!
Now, when it comes to reheating, you want to keep that cheesy goodness intact:
Oven Method: Preheat your oven to 350°F (175°C). Place the leftover pierogi bake in an oven-safe dish, cover it with aluminum foil to prevent drying out, and heat for about 15-20 minutes or until warmed through. This method helps retain that lovely texture!
Microwave Method: If you’re short on time, you can pop a serving in the microwave. Just place it on a microwave-safe plate, cover it with a damp paper towel (to keep it from drying out), and heat in 30-second intervals until warmed. It’s quick and easy, but may not be as crispy as the oven method.
By following these simple storage and reheating tips, you can savor the comfort of your Kielbasa Pierogi Bake even on those busy days. Enjoy every bite!
FAQ Section
Can I use frozen pierogi for this recipe?
Absolutely! Frozen pierogi work just fine and can save you some time. Just make sure to thaw them slightly before layering to help them cook evenly.
What kind of kielbasa should I use?
I recommend using smoked kielbasa for that rich, savory flavor, but feel free to try other types like turkey or chicken kielbasa if you want a lighter option!
Can I prepare this dish ahead of time?
Yes! You can assemble the Kielbasa Pierogi Bake a day in advance. Just cover it tightly and store it in the fridge. When you’re ready to bake, you may need to add an extra few minutes to the cooking time.
Is this dish gluten-free?
Yes, it can be gluten-free! Just make sure to use gluten-free pierogi and double-check the kielbasa labels to ensure they don’t contain any gluten. Easy peasy!
How can I make this dish spicier?
If you love a bit of heat, try adding some diced jalapeños or a sprinkle of red pepper flakes to the kielbasa and onion mixture while cooking. It’ll give your bake a nice kick!
I share easy, flavorful recipes that make home cooking simple, fun, and totally satisfying. Let's get in the kitchen and create something delicious together!


What do you think?
Share your thoughts, tips, or variations on this recipe!