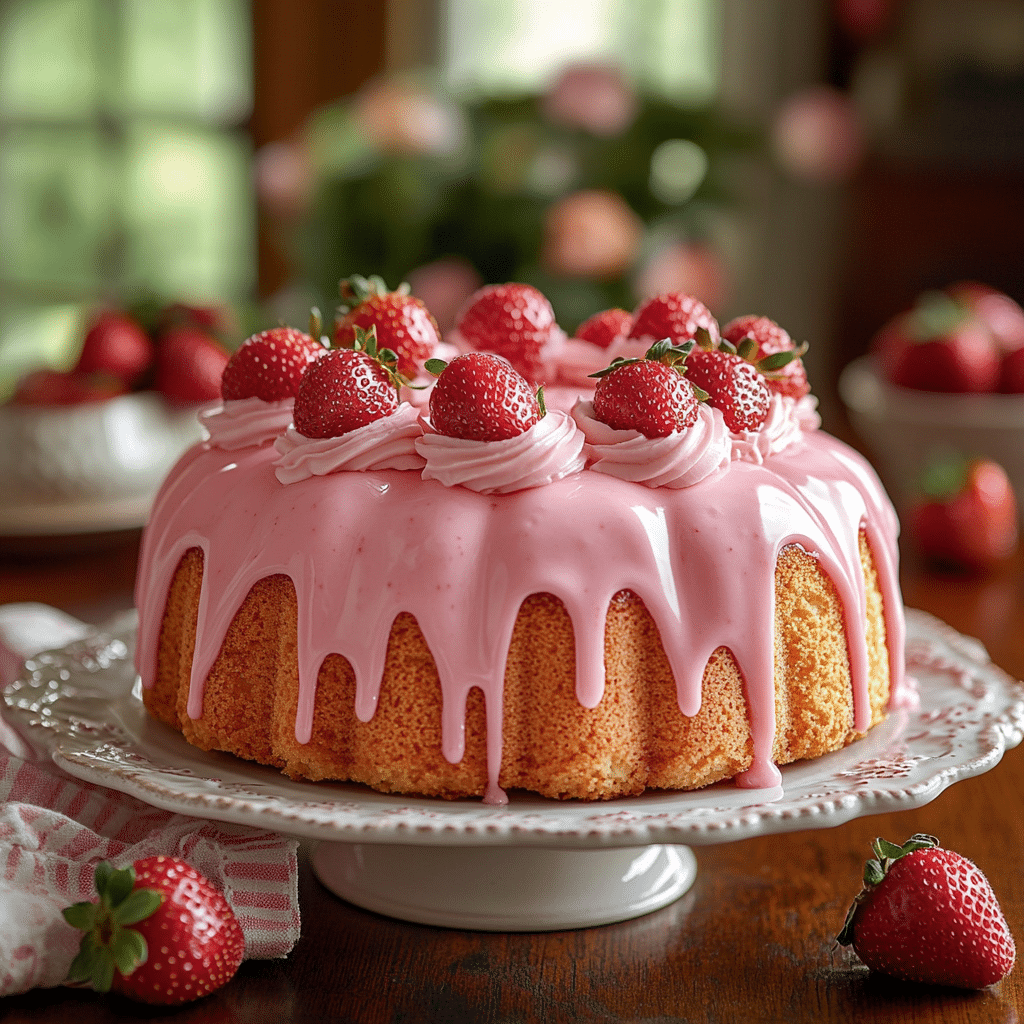
Oh my goodness, let me tell you about my absolute favorite dessert—Pink Velvet Cake! This beauty is like a sweet hug in cake form, with a soft, moist texture and that lovely pink color that just brightens up any occasion. I remember the first time I baked this cake; it was for my best friend’s birthday, and the moment she cut into it, her eyes lit up! The combination of flavors is simply divine, especially when paired with a rich cream cheese frosting that takes it to another level. Trust me, you’re going to want to add this to your baking repertoire. It’s perfect for celebrations, or just when you need a little treat to brighten your day. Get ready to impress your friends and family with this delightful dessert!
Ingredients for Pink Velvet Cake
2 1/2 cups all-purpose flour – This is the base of your cake, giving it structure and a lovely crumb.
1 1/2 cups granulated sugar – This sweetens the cake and helps create that moist texture we all love.
1 cup vegetable oil – This adds richness and keeps the cake super moist, so don’t skimp on it!
1 cup buttermilk – This is key for that tender crumb and a bit of tang that complements the sweetness.
2 large eggs – They help bind everything together and add to the cake’s fluffiness.
1 tablespoon vanilla extract – Just a splash of this adds a wonderful flavor that makes the cake sing!
1 tablespoon cocoa powder – Just a tiny bit enhances the flavor and helps achieve that gorgeous pink hue.
1 teaspoon baking soda – This is what makes your cake rise and become airy.
1 teaspoon salt – A little salt enhances all the flavors in the cake, trust me on this one!
1 tablespoon red food coloring – This is what gives your cake that signature pink color. Feel free to adjust for a deeper shade!
How to Prepare Pink Velvet Cake
Preheat the Oven
First things first, let’s get that oven preheating! Set it to 350°F (175°C). Preheating is super important because it ensures your cake bakes evenly and rises beautifully. You don’t want to put your batter in a cold oven—trust me, it can lead to sad, flat cakes!
Prepare Dry Ingredients
In a large mixing bowl, combine 2 1/2 cups of all-purpose flour, 1 1/2 cups of granulated sugar, 1 tablespoon of cocoa powder, 1 teaspoon of baking soda, and 1 teaspoon of salt. Give it a good whisk until everything is evenly mixed. This step is crucial for distributing the baking soda and cocoa powder throughout the flour, which helps your cake rise and adds that lovely color.
In another bowl, mix together 1 cup of vegetable oil, 1 cup of buttermilk, 2 large eggs, 1 tablespoon of vanilla extract, and 1 tablespoon of red food coloring. Whisk it all together until it’s smooth and well combined. The oil and buttermilk will keep your cake super moist, while the food coloring is what makes it that delightful pink color!
Mix Batter
Now, it’s time to bring it all together! Pour the wet ingredients into the bowl with the dry ingredients. Gently mix until everything is just combined. Be careful not to overmix—this can make your cake tough. You’re looking for a beautifully smooth batter with no lumps!
Bake the Cakes
Grease your cake pans and pour the batter evenly into them. Bake in your preheated oven for 25-30 minutes. You’ll know they’re done when a toothpick inserted in the center comes out clean or with just a few crumbs. Keep an eye on them—overbaking can dry out your cake!
Cool and Frost
Once baked, let the cakes cool in the pans for about 10 minutes before transferring them to a wire rack to cool completely. This step is essential because it helps them set and makes frosting easier. Once they’re cool, go ahead and slather on that luscious cream cheese frosting. Enjoy every bite of this gorgeous cake!
Nutritional Information
When you’re indulging in a slice of this delightful Pink Velvet Cake, it’s good to know what you’re treating yourself to! Here’s a breakdown of the estimated nutritional values based on typical ingredients used:
Serving Size: 1 slice
Calories: 350
Fat: 18g
Saturated Fat: 3g
Unsaturated Fat: 12g
Trans Fat: 0g
Cholesterol: 40mg
Sodium: 200mg
Carbohydrates: 45g
Fiber: 1g
Sugar: 30g
Protein: 3g
Keep in mind that these values are estimates and can vary depending on the specific brands and ingredients you use. But hey, a slice of cake now and then is part of living life to the fullest, right? Enjoy every mouthful!
Why You’ll Love This Recipe
It’s super easy to make—perfect for bakers of all skill levels!
The moist and fluffy texture makes every bite melt in your mouth.
That stunning pink color adds a gorgeous pop to any dessert table.
The rich cream cheese frosting perfectly complements the cake’s sweetness.
It’s a crowd-pleaser—everyone will be asking for seconds!
Great for any occasion—birthdays, holidays, or just because!
Leftovers (if there are any!) stay moist and delicious for days.
You can easily customize it with different flavors or decorations.
It’s a delightful way to bring a little joy to your day!
Tips for Success
Alright, let’s make sure your Pink Velvet Cake turns out absolutely perfect! Here are my tried-and-true tips that I swear by:
Use Room Temperature Ingredients: This is a game changer! Make sure your eggs and buttermilk are at room temperature before you start mixing. This helps create a smoother batter and ensures your cake rises beautifully.
Don’t Skip the Cocoa Powder: Even though it’s just a tablespoon, it does wonders for the flavor and helps achieve that lovely pink hue. It adds depth without making it taste like chocolate—trust me, it’s a must!
Adjust the Food Coloring: If you want a more intense pink, feel free to add a little more food coloring. Just do it gradually; you can always add more, but you can’t take it out once it’s in!
Be Careful Not to Overmix: When combining the wet and dry ingredients, mix until just combined. Overmixing can lead to a dense cake, and we want it light and fluffy!
Check for Doneness Early: Oven temperatures can vary, so start checking your cakes a few minutes before the 25-minute mark. A toothpick should come out clean or with just a few crumbs for the perfect bake.
Cool Completely Before Frosting: Patience is key! Make sure your cakes are completely cool before you slather on that cream cheese frosting. This prevents the frosting from melting and sliding off.
Experiment with Flavors: Feel free to mix things up! A hint of almond extract or lemon zest can add a delightful twist to the flavor profile of your cake.
With these tips, you’ll be on your way to baking the most divine Pink Velvet Cake ever. Happy baking!
Variations of Pink Velvet Cake
If you’re anything like me, you love experimenting in the kitchen! Here are some fun and delicious variations of the Pink Velvet Cake to keep things exciting:
Chocolate Chip Pink Velvet Cake: Who doesn’t love a little chocolate surprise? Fold in some semi-sweet chocolate chips into the batter before baking. The melty bits will create a delightful contrast with the pink cake!
Almond Extract Twist: Swap out the vanilla extract for almond extract for a nutty, aromatic flavor that pairs beautifully with the cake. Just a teaspoon will do—trust me, it’s an amazing upgrade!
Coconut Cream Pink Velvet Cake: Add shredded coconut to the batter for a tropical flair. You can also top it with coconut frosting for a delightful finish that sings of summer!
Lemon Zest Infusion: A little lemon zest mixed into the batter can brighten the flavor profile. It adds a refreshing tang that perfectly complements the sweetness of the cake.
Red Velvet Layer Cake: Make a red velvet version by adjusting the food coloring to achieve a deeper red hue. Layer it with cream cheese frosting between the cakes for a classic twist!
Spiced Pink Velvet Cake: Add a sprinkle of cinnamon or nutmeg to the dry ingredients for a warm, spiced flavor that’s perfect for fall gatherings!
Fruit-Filled Pink Velvet Cake: Incorporate fresh berries, like raspberries or strawberries, into the batter or as a filling between layers. They add a burst of flavor and a lovely splash of color!
These variations are a fantastic way to make the Pink Velvet Cake your own. So, feel free to get creative and customize it to your heart’s content! Happy baking!
Storage & Reheating Instructions
Alright, let’s talk about how to keep your Pink Velvet Cake fresh and delicious! If you happen to have any leftovers (which is a big if because it’s so good!), make sure to store them properly. Place the cake in an airtight container to keep it moist. If you’ve already frosted it, that’s even better—just cover it well with plastic wrap or a lid. The cake will stay fresh in the fridge for about 4-5 days. Yum!
If you want to enjoy a slice later, you can also freeze it! Slice the cake into individual pieces, wrap each slice tightly in plastic wrap, and then place them in a freezer-safe container. This way, you can pull out just what you need without thawing the whole cake. It’ll stay good in the freezer for up to 2 months. When you’re ready to indulge, simply thaw the slices in the refrigerator overnight.
Now, for reheating, you have a couple of options. If you prefer it warm, pop a slice in the microwave for about 10-15 seconds. Just be careful not to overheat it, or you’ll end up with a gooey mess! Alternatively, you can place a slice in a preheated oven at 350°F (175°C) for about 5-7 minutes. Either way, you’ll have a deliciously cozy piece of cake ready to enjoy!
FAQ About Pink Velvet Cake
Can I use a different type of frosting? Absolutely! While cream cheese frosting is a classic pairing, you can use buttercream, whipped cream, or even a chocolate ganache if you’re feeling adventurous. Just pick a frosting that complements the sweet flavors of the cake!
How can I make it gluten-free? No problem! Simply swap the all-purpose flour with a good gluten-free flour blend. Make sure it contains xanthan gum, or add it separately to help with the texture. Your cake will still be moist and delicious!
What can I serve with this cake? This cake is delightful on its own, but if you want to elevate it further, try serving it with fresh berries, a scoop of vanilla ice cream, or a drizzle of chocolate sauce. A dollop of whipped cream also adds a lovely touch!
Can I make this cake ahead of time? Yes! You can bake the cake a day or two in advance. Just make sure to store it properly in an airtight container. If you frost it ahead of time, keep it in the fridge to maintain freshness.
How do I know when the cake is done baking? Great question! The best way to check is by inserting a toothpick into the center of the cake. If it comes out clean or with just a few moist crumbs, it’s ready. Keep an eye on it starting around the 25-minute mark to avoid overbaking!
Can I use less food coloring? Absolutely! If you prefer a lighter pink, feel free to reduce the amount of food coloring. Just remember that the vibrant color is part of the fun, but it’s all about your personal taste!
I share easy, flavorful recipes that make home cooking simple, fun, and totally satisfying. Let's get in the kitchen and create something delicious together!


What do you think?
Share your thoughts, tips, or variations on this recipe!