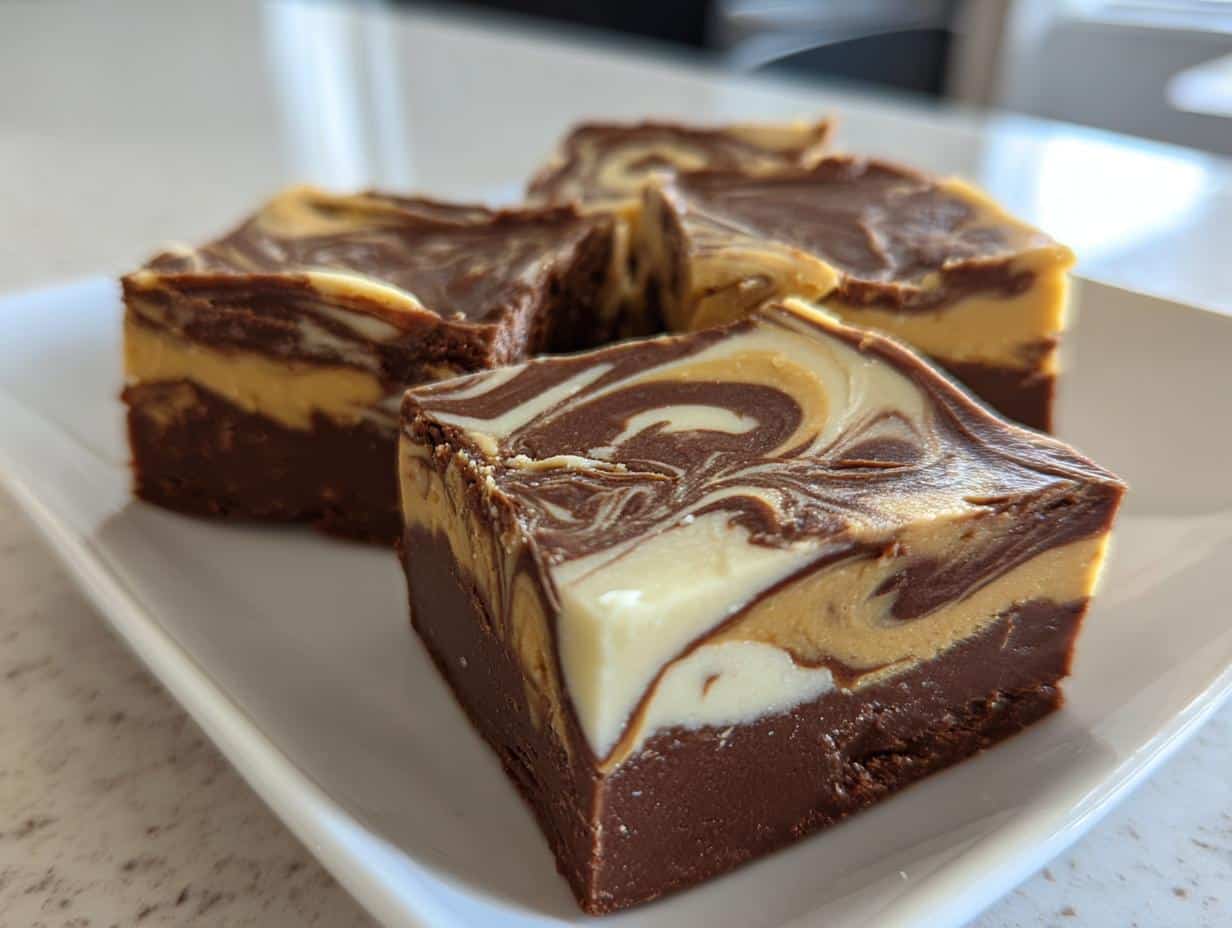
Oh my goodness, let me tell you about the magic that happens when rich chocolate meets creamy peanut butter! This Peanut Butter Swirl Fudge is an absolute dream—it’s smooth, decadent, and just the right amount of sweet. I first stumbled upon this recipe during a cozy evening with friends, and it quickly became my go-to treat for any gathering. The way the peanut butter swirls beautifully into the chocolate is not just a feast for the taste buds but also for the eyes! Trust me, once you try it, you’ll be hooked. It’s a delightful combination that’s hard to resist!
Ingredients List
Before we dive into making this dreamy fudge, let’s gather our ingredients. You’ll want to make sure you have everything on hand for that perfect fudge magic!
2 cups semi-sweet or dark chocolate chips
1 cup sweetened condensed milk
1/2 cup creamy peanut butter
1 teaspoon pure vanilla extract
1/4 teaspoon fine sea salt
These simple yet rich ingredients come together in such a beautiful way. Trust me, you won’t want to skimp on the quality—go for the good chocolate and peanut butter! It makes all the difference in flavor. Now that we’ve got our goodies ready, let’s get to making that fudge!
Alright, let’s get into the fun part—making this Peanut Butter Swirl Fudge! I promise it’s easier than it looks, and the results are absolutely worth it. Grab your ingredients, and let’s dive in!
Step-by-Step Instructions
First things first, line an 8×8 inch pan with parchment paper. This makes it super easy to lift the fudge out later. Trust me, it saves you a lot of hassle!
Now, in a medium saucepan, combine your chocolate chips and sweetened condensed milk over low heat. Stir continuously until everything is melted and smooth. This is where the magic begins, and oh, the aroma is heavenly!
Once melted, pour half of that luscious chocolate mixture into the prepared pan. Spread it out evenly—this is going to be the base layer of your fudge.
Next, in a separate bowl, mix together the creamy peanut butter, vanilla extract, and fine sea salt until it’s nice and smooth. This is my favorite part; the smell of peanut butter is so comforting!
Drop spoonfuls of the peanut butter mixture over the chocolate layer. Don’t worry about being too neat; it’ll all come together in the next step.
Now, pour the remaining chocolate mixture on top, covering those peanut butter dollops completely.
Here comes the fun part! Grab a butter knife and gently swirl the peanut butter into the chocolate. You want to create a beautiful marbled effect, so don’t go overboard—just a few swirls will do!
Finally, pop the pan into the refrigerator for at least 2 hours. This will allow the fudge to firm up perfectly. Patience is key here, but it’ll be so worth the wait!
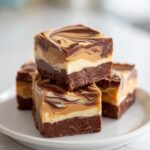
Once firm, take it out and cut it into squares. You’re ready to serve and enjoy this amazing treat!
And there you have it—delicious fudge with a peanut butter twist! I can’t wait for you to try it!
Why You’ll Love This Recipe
Quick Preparation: You can whip this fudge up in just about 15 minutes of prep time. It’s perfect for when you need a sweet fix in a flash!
Delicious Flavor Combination: The rich chocolate and creamy peanut butter swirl together in a way that’s nothing short of heavenly. Each bite is a delightful blend of flavors!
Easy to Store: This fudge keeps well in an airtight container, making it an ideal treat to have on hand for late-night cravings or unexpected guests.
Perfect for Gatherings: Whether it’s a party, potluck, or just a cozy night in, this fudge is always a crowd-pleaser. Everyone loves the classic combo of peanut butter and chocolate!
Customizable: Feel free to play around with the recipe! You can switch up the chocolate types, add nuts, or even sprinkle a bit of sea salt on top for that extra flair.
Seriously, once you get a taste of this fudge, you’ll be dreaming up reasons to make it again and again!
Tips for Success
Now that you’re ready to create this delightful Peanut Butter Swirl Fudge, let me share some of my best tips to ensure you achieve fudge perfection every time!
Quality Ingredients Matter: Seriously, don’t skimp here! Use high-quality chocolate chips and creamy peanut butter. It makes all the difference in flavor and texture. I love using semi-sweet chocolate for that perfect balance, but dark chocolate can really elevate the richness!
Gentle Melting: When melting the chocolate and sweetened condensed milk, keep the heat low and stir continuously. This prevents the chocolate from burning and turning gritty. If you notice it starting to stick or clump, just lower the heat even more and keep stirring. Patience is key!
Swirling Technique: When you’re swirling the peanut butter into the chocolate, don’t overdo it! You want those gorgeous ribbons of peanut butter to shine through. Just a few gentle swirls with a knife will create that beautiful marbled effect.
Chill Time Is Crucial: Make sure to let the fudge set in the fridge for a full two hours, or until it’s completely firm. If it’s not chilled long enough, it might not cut cleanly and could turn out too soft. Trust me, waiting is worth it!
Proper Storage: Once your fudge is ready, store it in an airtight container at room temperature for up to a week. If it lasts that long! For longer storage, you can pop it in the fridge. Just make sure to separate layers with parchment paper to keep it from sticking together.
With these tips, you’ll be well on your way to making the best Peanut Butter Swirl Fudge ever! Happy cooking!
Variations
One of the best things about this Peanut Butter Swirl Fudge is how versatile it is! You can easily switch things up and make it your own. Here are some fun variations to consider:
Chocolate Variety: Try using dark chocolate chips for a richer flavor, or even white chocolate for a sweeter, creamier twist. Each type of chocolate brings its own unique taste to the fudge!
Nuts Galore: If you’re a nut lover like me, consider adding some chopped peanuts or even walnuts into the mix. Just fold them into the chocolate layer before adding the peanut butter. It adds a delightful crunch!
Sea Salt Sprinkle: For a gourmet touch, sprinkle a little flaky sea salt on top of the fudge just before refrigerating. It enhances the sweetness and creates a fabulous contrast with the chocolate and peanut butter.
Marshmallow Swirl: Add some mini marshmallows to the peanut butter mixture for a fun, gooey surprise. Just make sure to swirl them in gently so they don’t completely melt away!
Flavored Peanut Butter: Experiment with different flavored peanut butters like chocolate or maple for a unique spin. It’s an easy way to infuse new flavors without much effort!
With these variations, you can create a new fudge experience every time you make it! Get creative and have fun with it—there are endless possibilities to explore!
Storage & Reheating Instructions
Storing your Peanut Butter Swirl Fudge is super easy! Once it’s fully set and cut into squares, just place the fudge in an airtight container. You can keep it at room temperature for about a week. It’s perfect for those late-night cravings or surprise guests!
If you want to keep it for longer, you can refrigerate the fudge. Just remember to separate the layers with parchment paper to prevent them from sticking together. It can last in the fridge for up to two weeks—if it lasts that long!
Now, if you find yourself with some leftover fudge and you want to enjoy it later, there’s no need to reheat it. Just serve it chilled straight from the fridge for that perfect fudge experience. But if you prefer it a bit softer, let it sit at room temperature for about 10-15 minutes before indulging. Trust me, that creamy texture is heavenly!
With these simple storage tips, you can savor your fudge for days to come. Enjoy every delicious bite!
Nutritional Information
Curious about what’s in this delectable Peanut Butter Swirl Fudge? Here’s a quick look at the typical nutritional values per square. Keep in mind that these numbers are estimates based on the ingredients listed in the recipe, so they might vary slightly depending on your specific brands and measurements.
Calories: 150
Fat: 8g
Saturated Fat: 3g
Unsaturated Fat: 5g
Trans Fat: 0g
Cholesterol: 5mg
Sodium: 50mg
Carbohydrates: 17g
Fiber: 1g
Sugar: 10g
Protein: 3g
This fudge is a delightful treat, but just remember to enjoy it in moderation! With its rich flavors and creamy texture, it’s definitely a sweet indulgence worth savoring.
FAQ Section
How long does the fudge last? Once you’ve made your Peanut Butter Swirl Fudge, it can last up to a week at room temperature in an airtight container. If you store it in the fridge, it can keep well for about two weeks. Just make sure to separate the layers with parchment paper!
Can I use natural peanut butter? You can definitely use natural peanut butter, but keep in mind that it has a different texture and consistency. It might make the fudge a bit less creamy and more crumbly. If you go this route, try to choose a natural peanut butter that’s smooth and stir it well before using.
What can I substitute for sweetened condensed milk? If you’re looking for a substitute for sweetened condensed milk, you can use a mixture of evaporated milk and sugar. For each cup of sweetened condensed milk, combine 1 cup of evaporated milk with 1 1/4 cups of sugar, and heat gently until the sugar dissolves. Alternatively, you can try using coconut milk with sugar for a dairy-free version!
Can I freeze the fudge? Absolutely! If you want to enjoy your fudge later, you can freeze it. Just wrap each piece tightly in plastic wrap and place them in a freezer-safe container. They can be stored in the freezer for up to two months. When you’re ready to indulge, let them thaw in the fridge overnight.
What if my fudge is too soft? If your fudge turns out too soft, it probably needs more chilling time. Just pop it back in the fridge for a bit longer until it firms up. If it’s still too soft after chilling, you could try adding a little more melted chocolate and mixing it in, then re-chill.
I share easy, flavorful recipes that make home cooking simple, fun, and totally satisfying. Let's get in the kitchen and create something delicious together!


What do you think?
Share your thoughts, tips, or variations on this recipe!