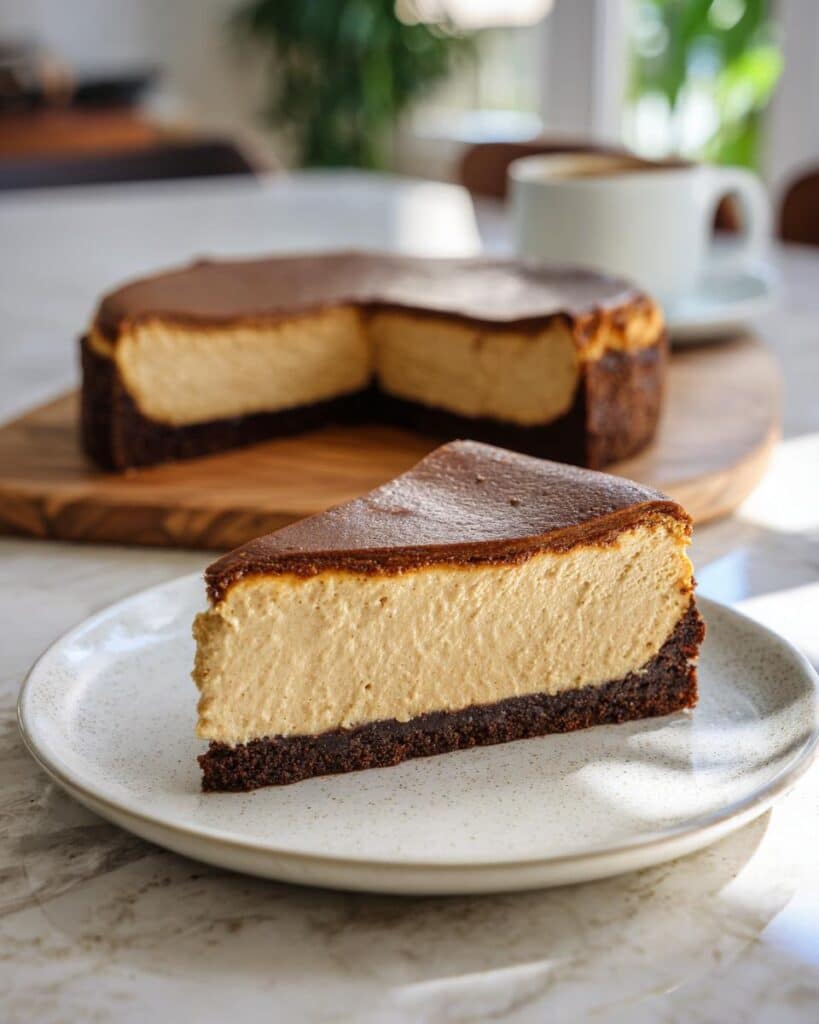
Oh, let me tell you about the magic of a rich dessert that makes everything better—black velvet cake with Oreo frosting! This cake is a showstopper, with its deep, luxurious color and that utterly irresistible creamy topping. The first time I made this beauty, my kitchen was filled with the most heavenly chocolate aroma. I could hardly wait for it to cool before diving in! Trust me, the combination of the moist, velvety cake and the crunchy Oreo frosting takes every bite to another level. It’s perfect for celebrations or just to treat yourself on a cozy afternoon!
Ingredients for Black Velvet Cake with Oreo Frosting
Here’s everything you’ll need to whip up this indulgent black velvet cake with Oreo frosting. Make sure you gather these ingredients before you start; it’ll make the process so much smoother!
2 cups all-purpose flour
1 cup sugar
1 cup unsweetened cocoa powder
1 teaspoon baking soda
1 teaspoon baking powder
1 teaspoon salt
1 cup buttermilk, at room temperature
1 cup vegetable oil
2 large eggs, at room temperature
2 teaspoons vanilla extract
1 tablespoon red food coloring
1 cup crushed Oreo cookies (feel free to adjust for more flavor!)
1 cup softened butter (make sure it’s nice and creamy)
4 cups powdered sugar
2 tablespoons milk (this helps achieve that perfect frosting consistency)
How to Prepare Black Velvet Cake with Oreo Frosting
Alright, let’s get down to the nitty-gritty of making this delicious black velvet cake with Oreo frosting! I promise you, it’s a lot easier than it sounds, and the end result is absolutely worth every minute. Let’s dive in!
First things first, you’ll want to preheat your oven to 350°F (175°C). This step is super important because it ensures your cakes bake evenly and rise beautifully! While that’s heating up, grab two 9-inch round cake pans and grease them well with butter or cooking spray, then dust them lightly with flour. This will prevent any sticky situations later! In a large mixing bowl, whisk together the flour, sugar, cocoa powder, baking soda, baking powder, and salt until everything is well combined. The rich chocolate fragrance already wafting up is just a sneak peek of what’s to come!
Mixing Wet Ingredients
Now, in a separate bowl, it’s time to mix up your wet ingredients. Combine the buttermilk, vegetable oil, eggs, vanilla extract, and red food coloring. I like to give these a good whisk until they’re all blended together nicely—trust me, the food coloring really adds that signature black velvet hue! Once you’ve got that smooth, vibrant mixture, pour it into the dry ingredients. Gently stir until everything is just combined. Be careful not to overmix; we want that cake to stay light and fluffy!
Baking the Cakes
Next, divide the batter evenly between your prepared cake pans. It’s always a good idea to use a kitchen scale if you have one, just to make sure both cakes are the same size. Pop them in the oven and bake for 25-30 minutes. You’ll know they’re done when a toothpick inserted into the center comes out clean. Make sure to resist the urge to open the oven door too early—this can cause the cakes to sink!
Making the Oreo Frosting
While the cakes are cooling, let’s whip up that dreamy Oreo frosting! In a mixing bowl, beat the softened butter until it’s creamy and fluffy—this step is crucial for a smooth frosting. Gradually add in the powdered sugar and milk, mixing until everything is well combined and you achieve a luscious, spreadable consistency. Finally, gently fold in those crushed Oreo cookies. The texture and flavor of those bits will take your frosting to a whole new level!
Assembling the Cake
Once your cakes have completely cooled (this is key, or the frosting will melt!), it’s time to stack and frost! Place one cake layer on a serving plate, spread a generous layer of Oreo frosting on top, and then carefully add the second layer. Use the remaining frosting to cover the top and sides of the cake, making it as smooth or textured as you like. To really impress, I like to sprinkle some extra crushed Oreos on top for a fun finish. And voilà! Your stunning black velvet cake with Oreo frosting is ready to shine!
Why You’ll Love This Recipe
Rich flavor: The deep, chocolatey taste of the black velvet cake perfectly complements the creamy Oreo frosting, creating a dessert that’s simply irresistible.
Easy to follow: With straightforward steps and common ingredients, this recipe is perfect for both beginner bakers and seasoned pros.
Perfect for celebrations: Whether it’s a birthday, anniversary, or just a special treat, this cake is sure to impress your guests and become the star of the show.
Uses familiar ingredients: You probably already have most of these ingredients in your pantry, making it a convenient choice for a spontaneous baking session!
Tips for Success
Alright, let’s ensure your black velvet cake with Oreo frosting turns out absolutely perfect! I’ve got some tried-and-true tips that’ll help you avoid common pitfalls and make this dessert a total triumph.
Room temperature ingredients: Make sure your buttermilk, eggs, and butter are at room temperature before you start. This helps everything blend together smoothly and creates a lighter, fluffier cake.
Don’t overmix: When combining the wet and dry ingredients, mix just until everything is incorporated. Overmixing can lead to a dense cake, and we want it to be nice and airy!
Properly measure your flour: Use the spoon-and-level method or a kitchen scale to measure your flour. Scooping directly from the bag can compact it, leading to too much flour and a dry cake.
Check for doneness: When you insert a toothpick, look for a few moist crumbs, not wet batter. If you wait too long, the cakes can dry out. Keep an eye on them during baking!
Cool completely: Let your cakes cool in the pans for about 10 minutes before transferring them to wire racks. This helps them set properly and prevents breakage.
Make your frosting ahead: If you’re short on time, feel free to make the frosting a day in advance and store it in the fridge. Just give it a quick mix before spreading it on the cake.
Decorate with flair: Don’t be afraid to get creative with your frosting! Use a piping bag for beautiful swirls or add extra crushed Oreos for texture. Presentation is half the fun!
With these tips, you’ll be well on your way to creating a show-stopping black velvet cake that’ll have everyone asking for seconds!
Storage & Reheating Instructions
So, you’ve made this gorgeous black velvet cake with Oreo frosting, and now you’re wondering how to keep it fresh for those later cravings—am I right? Don’t worry, I’ve got you covered! Proper storage is key to maintaining that rich flavor and moist texture.
First things first, if you have any leftovers (which is always a possibility, but this cake disappears quickly!), let the cake cool completely before storing. Once it’s cool, you can either keep it whole or slice it into individual pieces. I find that keeping it whole helps retain its moisture better, but it’s totally up to you!
To store the cake, wrap it tightly in plastic wrap or place it in an airtight container. This will help prevent it from drying out and protect it from any unwanted fridge odors. If you’ve got a cake dome, that works beautifully too! Just make sure it’s sealed well.
Your black velvet cake will stay fresh in the fridge for about 4-5 days. If you want to keep it longer, go ahead and freeze it! Just wrap each slice or the whole cake in plastic wrap and then in aluminum foil for extra protection. It’ll be good for up to 2-3 months in the freezer. When you’re ready to enjoy it again, simply transfer it to the fridge to thaw overnight. This way, you won’t lose any of that delicious texture!
Now, if you prefer to enjoy it warm, here’s a little tip for reheating: preheat your oven to 350°F (175°C), then wrap a slice in aluminum foil to keep it from drying out. Heat for about 10-15 minutes until warmed through. This method helps revive that fresh-baked taste! Microwaving is also an option, but be careful not to overdo it; 15-20 seconds should do the trick. You want it warm, not a gooey mess!
With these storage and reheating tips, you’ll be able to savor every last bite of that decadent black velvet cake with Oreo frosting, even days later!
Nutritional Information
As you indulge in this scrumptious black velvet cake with Oreo frosting, it’s always nice to have a rough idea of what you’re enjoying! Below is the estimated nutritional information per slice, based on typical values. Keep in mind that actual values can vary based on specific ingredients and portion sizes.
Calories: 450
Total Fat: 25g
Saturated Fat: 10g
Unsaturated Fat: 10g
Trans Fat: 0g
Cholesterol: 50mg
Sodium: 200mg
Carbohydrates: 55g
Fiber: 2g
Sugar: 35g
Protein: 5g
This delightful treat is definitely rich, so enjoy it in moderation. Whether you’re celebrating a special occasion or just treating yourself, this cake is worth every indulgent calorie!
FAQ About Black Velvet Cake with Oreo Frosting
Got questions about making the perfect black velvet cake with Oreo frosting? Don’t worry, I’ve got answers! Here are some common queries I hear and my trusty tips to help you out.
Can I make this cake ahead of time?
Absolutely! This cake is great for making in advance. You can bake the cakes a day or two ahead and store them wrapped in plastic wrap. Just frost it the day you plan to serve it to keep that frosting fresh and delicious!
What can I substitute for buttermilk?
If you don’t have buttermilk on hand, no worries! You can easily make a substitute by mixing 1 cup of milk with 1 tablespoon of vinegar or lemon juice. Let it sit for about 5 minutes, and you’ll have a perfect buttermilk replacement!
How can I make this cake gluten-free?
To make a gluten-free version, simply swap the all-purpose flour for a 1:1 gluten-free flour blend. Make sure to check that all other ingredients are gluten-free too, like the baking powder and Oreo cookies!
Can I use a different frosting?
Sure thing! While the Oreo frosting is to die for, you can switch it up with a classic cream cheese frosting or even a rich chocolate ganache if you’re feeling extra indulgent! Just remember, the frosting should complement that delightful black velvet flavor.
What’s the best way to serve this cake?
I love serving this cake with a scoop of vanilla ice cream or a dollop of whipped cream for a decadent touch. You can also garnish it with extra crushed Oreos or chocolate shavings for that wow factor!
How do I store leftovers?
Keep any leftovers stored in an airtight container in the fridge for up to 4-5 days. If you want to keep it longer, you can freeze individual slices wrapped tightly in plastic wrap and then foil for up to 2-3 months. Just thaw in the fridge overnight before enjoying!
Can I bake this in a different pan size?
Definitely! If you’d like to make a sheet cake or cupcakes, just adjust the baking time accordingly. For cupcakes, start checking for doneness around 18-20 minutes, and for a sheet cake, it might take a bit longer than the round cakes. Always use that toothpick test!
I hope this FAQ helps you tackle any questions you had about this delightful black velvet cake with Oreo frosting. Happy baking, and enjoy every scrumptious bite!
I share easy, flavorful recipes that make home cooking simple, fun, and totally satisfying. Let's get in the kitchen and create something delicious together!


What do you think?
Share your thoughts, tips, or variations on this recipe!