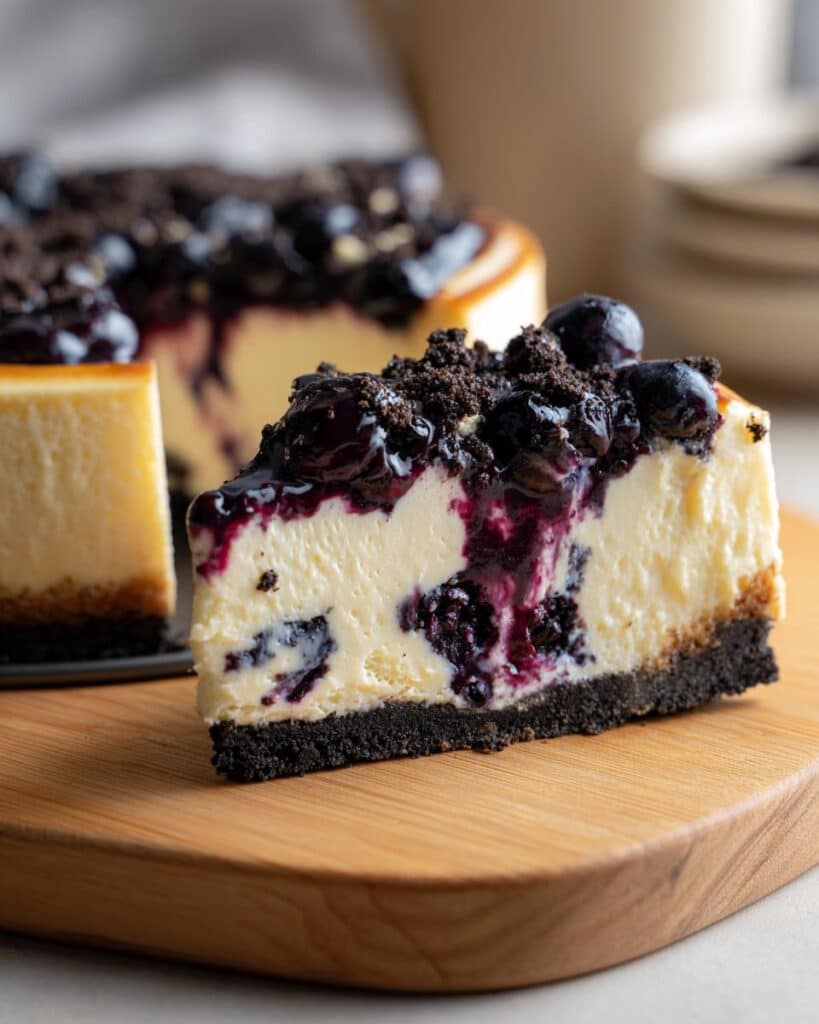
Oh my goodness, let me tell you about my love affair with cheesecake! There’s just something magical about that creamy, dreamy texture that makes my heart skip a beat. I remember the first time I tried a blueberry cheesecake; it was at a friend’s birthday party, and I was instantly hooked! Now, imagine that luscious flavor combined with the chocolatey crunch of Oreos—hello, blueberry velvet Oreo cheesecake! It’s like a sweet hug for your taste buds.
The vibrant blueberries pop against the rich cream cheese, creating a delightful contrast that elevates the classic cheesecake experience. Trust me, this dessert is not just a treat; it’s a celebration on a plate. You’ll definitely want to make this for your next gathering, or even just a cozy night in! It’s that good!
Ingredients List
2 cups of crushed Oreo cookies (for that perfect crunchy crust)
1/2 cup of melted butter (to bind the crust together)
16 oz cream cheese, softened (make sure it’s at room temperature for easy mixing)
1 cup sugar (for that sweet, velvety goodness)
2 cups fresh blueberries (the star of the show!)
3 eggs (to give it that creamy texture)
1 tsp vanilla extract (for a hint of warmth)
1/4 cup sour cream (adds extra creaminess and tang)
1/4 cup blueberry puree (for a boost of blueberry flavor)
How to Prepare Blueberry Velvet Oreo Cheesecake
Preheat and Prepare the Crust
First things first, you’ll want to preheat your oven to 325°F (160°C). Trust me, this step is crucial for the perfect bake! While that’s warming up, grab your springform pan and get ready to create the crust. In a bowl, mix together the crushed Oreo cookies and melted butter until it resembles damp sand. It’s so satisfying! Then, press this mixture firmly into the bottom of your pan, making sure it’s even. You want a solid foundation for all that creamy goodness to sit on. Once that’s done, set it aside and let’s move on to the filling!
Mix the Cheesecake Filling
Now, let’s whip up that luscious filling! In a large mixing bowl, beat the softened cream cheese and sugar together until it’s smooth and creamy—no lumps allowed! This part is so important, so take your time. Next, add the eggs one at a time, mixing well after each addition. This ensures everything is well combined and fluffy. Once that’s done, stir in the vanilla extract, sour cream, and blueberry puree. Can you smell that? It’s heavenly! Finally, gently fold in the fresh blueberries. This is where the magic happens, so be careful not to mash them—just a gentle embrace will do!
Alright, it’s time to bring it all together! Pour that rich cheesecake mixture over your prepared Oreo crust, spreading it out evenly. Bake it in your preheated oven for 50-60 minutes. You’ll know it’s done when the edges are set but the center still has a slight jiggle—don’t worry, it’ll firm up as it cools! Once baked, remove it from the oven and let it cool at room temperature for a bit before transferring it to the fridge. You’ll want to chill it for at least 4 hours, but overnight is even better if you can wait! This cooling time is essential for all those flavors to meld beautifully.
Nutritional Information
Here’s the estimated nutritional breakdown for a slice of my delicious blueberry velvet Oreo cheesecake. Keep in mind that these values can vary based on specific ingredients and portion sizes, but this should give you a good idea:
Calories: 350
Fat: 20g
Saturated Fat: 10g
Unsaturated Fat: 8g
Trans Fat: 0g
Cholesterol: 80mg
Sodium: 200mg
Carbohydrates: 30g
Sugar: 25g
Fiber: 2g
Protein: 5g
So, whether you’re counting calories or just indulging a little, this cheesecake is the perfect blend of rich and delightful! Enjoy every bite!
Why You’ll Love This Recipe
Creamy texture that melts in your mouth
Unique flavor combination of rich cream cheese, sweet blueberries, and crunchy Oreos
Easy to prepare, making it a great choice for both beginners and seasoned bakers
Perfect for any occasion, whether it’s a birthday, holiday, or just because you deserve a treat!
Tips for Success
Alright, let’s make sure your blueberry velvet Oreo cheesecake turns out absolutely perfect! Here are some of my favorite tips to avoid common pitfalls:
Room Temperature Ingredients: Always make sure your cream cheese and eggs are at room temperature before mixing. This helps achieve that smooth texture we’re after and prevents any lumps in your filling!
Don’t Overmix: When you’re mixing the filling, be gentle! Overmixing can add too much air, which may cause cracks in the cheesecake as it bakes. Just mix until everything is combined, and you’ll be golden!
Check for Doneness: Keep an eye on your cheesecake in the oven. If the edges look set but the center still jiggles slightly, it’s ready to come out. Remember, it will continue to cook a bit while it cools!
Chill Properly: Patience is key! Allow your cheesecake to cool at room temperature for a while before refrigerating. This helps it set properly and meld those fabulous flavors together.
Use Fresh Blueberries: For the best flavor, always opt for fresh blueberries. Frozen ones can add extra moisture, which might affect the texture of your cheesecake. You want that burst of fresh blueberry goodness!
Top It Off: Just before serving, don’t forget to add a dollop of whipped cream and a sprinkle of extra blueberries on top. It not only looks stunning but adds that final touch of deliciousness!
Follow these tips, and you’ll be well on your way to impressing friends and family with your stunning cheesecake creation. Happy baking!
Variations
If you’re feeling adventurous or just want to switch things up, there are so many fun variations you can try with this blueberry velvet Oreo cheesecake! Here are some of my favorite ideas:
Fruit Swaps: Instead of blueberries, why not use raspberries or strawberries? They’ll bring their own unique twist to the cheesecake and complement that creamy texture beautifully!
Chocolate Lovers: For a decadent twist, mix in some melted dark chocolate into the cheesecake filling. You could even use chocolate sandwich cookies for the crust instead of Oreos for an extra chocolatey treat!
Nutty Crunch: If you want to add a bit of texture, consider mixing in crushed nuts like pecans or walnuts into the crust. It adds a delightful crunch that pairs wonderfully with the creamy filling.
Citrus Zest: Brighten up the flavors by adding a teaspoon of lemon or orange zest into the filling. This little addition will elevate the taste and bring a refreshing zing to every bite!
Caramel Drizzle: Drizzle some caramel sauce over the top before serving. It adds a lovely sweetness that pairs perfectly with the tangy blueberries and rich cream cheese.
Different Crusts: Feel free to experiment with different crust options! A graham cracker crust or even a gluten-free cookie crust can easily be swapped in for the Oreos, just adjust the amounts accordingly.
These variations can transform your cheesecake into something new and exciting, so don’t hesitate to get creative! Who knows, you might just stumble upon your new favorite flavor combination!
Storage & Reheating Instructions
Now that you’ve whipped up this gorgeous blueberry velvet Oreo cheesecake, you’ll want to make sure it stays fresh and delicious! Here’s how to store it properly:
Refrigeration: Always store your cheesecake in the refrigerator if you have leftovers. Just cover it tightly with plastic wrap or transfer it to an airtight container. It’ll keep well for up to 5 days—if it lasts that long!
Freezing: If you want to save some for later (or if you just can’t resist making a double batch!), you can freeze your cheesecake. Just slice it into individual pieces, wrap each slice in plastic wrap, and then place them in a freezer-safe container or a zip-top bag. It can be frozen for up to 2 months. Just remember to label it so you don’t forget what’s inside!
Thawing: When you’re ready to enjoy a slice from the freezer, simply transfer it to the fridge and let it thaw overnight. This way, it’ll gradually come back to that creamy, dreamy texture we all love. No need to rush it!
Reheating: Typically, cheesecake is best enjoyed chilled, so reheating isn’t necessary. However, if you prefer it slightly warm, you can pop a slice in the microwave for about 10-15 seconds. Just be cautious not to overheat it, or it might lose that glorious creaminess!
With these storage tips, you’ll be able to savor your delicious cheesecake for days to come. Enjoy every bite, whether it’s fresh or frozen!
Serving Suggestions
When it comes to serving my blueberry velvet Oreo cheesecake, I like to go the extra mile to elevate the dessert experience! Here are some delightful ideas to make your cheesecake even more memorable:
Whipped Cream: A generous dollop of freshly whipped cream on top adds a light, airy touch that pairs beautifully with the rich cheesecake. You can even sprinkle a bit of powdered sugar for that extra sweetness!
Fresh Berries: Scatter some extra fresh blueberries (or whatever berries you love) around the plate. Not only do they look stunning, but they also enhance that fruity flavor in the cheesecake.
Chocolate Ganache: Drizzle a luscious chocolate ganache over the top or alongside the slice. The combination of chocolate and blueberry is simply divine and adds an elegant touch!
Citrus Zest: For a zesty twist, garnish with some lemon or orange zest. It adds a pop of color and a refreshing contrast to the sweetness of the cheesecake.
Ice Cream: Serve each slice with a scoop of vanilla or blueberry ice cream on the side. The creaminess of the ice cream complements the cheesecake perfectly and makes for a decadent dessert!
Coffee or Tea: Don’t forget about the drinks! A nice cup of coffee or a soothing herbal tea can be the perfect accompaniment to balance out the richness of the cheesecake.
These serving suggestions not only enhance the flavors but also make your dessert presentation a showstopper. Get ready for some serious compliments when you serve this beauty at your next gathering!
I share easy, flavorful recipes that make home cooking simple, fun, and totally satisfying. Let's get in the kitchen and create something delicious together!


What do you think?
Share your thoughts, tips, or variations on this recipe!