Oh my goodness, let me tell you about this espresso cheesecake recipe! It’s like a hug in dessert form. The rich, creamy texture combined with the deep, bold flavor of espresso creates an experience that’s simply irresistible. I remember the first time I made it; the aroma of the espresso filling the kitchen was heavenly! My friends were absolutely blown away when I served it after dinner. They couldn’t believe such a decadent treat was homemade! Trust me, this cheesecake is not only a feast for the eyes but also a delightful dance of flavors on your palate. The chocolate crust adds a nice touch, making every bite a little celebration. Seriously, if you’re looking to impress or just treat yourself, this is the recipe to try!
Ingredients List
Here’s everything you’ll need to whip up this divine espresso cheesecake! Gather these ingredients and get ready for a treat that will have everyone asking for seconds:
1 ½ cups graham cracker crumbs
½ cup unsweetened cocoa powder
½ cup sugar
½ cup melted butter
4 (8 oz) packages cream cheese, softened
1 cup sugar
4 large eggs
1 cup sour cream
½ cup brewed espresso, cooled
1 teaspoon vanilla extract
(Make sure your cream cheese is softened for a smooth, creamy filling!)
Ready to dive into this delicious espresso cheesecake recipe? Let’s get started! Follow these simple steps, and soon you’ll be savoring every creamy bite.
Preheat your oven to 325°F (160°C). This is crucial for getting that perfect bake on your cheesecake.
In a mixing bowl, combine graham cracker crumbs, unsweetened cocoa powder, sugar, and melted butter. Stir until everything is well mixed and resembles wet sand.
Press this mixture firmly into the bottom of a 9-inch springform pan. You want a nice, even layer, so don’t be shy about using your hands!
In another large bowl, beat the softened cream cheese and sugar together until it’s smooth and creamy. This step is key for that luscious texture!
Now, add the eggs one at a time, mixing well after each addition. This will help incorporate air into your batter, making it light and fluffy.
Next, mix in the sour cream, cooled brewed espresso, and vanilla extract until everything is combined. Oh, the smell of espresso is just divine!
Pour the cream cheese mixture over the prepared crust in your springform pan, spreading it evenly.
Bake in the preheated oven for 55-60 minutes, or until the center is set but still slightly jiggly. It will firm up as it cools, so don’t worry if it has a little wiggle!
Once baked, turn off the oven and let the cheesecake cool in the oven with the door slightly ajar for about an hour. This gentle cooling helps prevent cracks.
Afterward, transfer the cheesecake to the refrigerator and chill for at least 4 hours (or overnight if you can wait!). This will give it that rich and creamy texture we all love.
And there you have it! Follow these steps, and your espresso cheesecake will be ready to dazzle your taste buds and your guests!
Why You’ll Love This Recipe
Rich, creamy texture that melts in your mouth—each bite is pure bliss!
Deep, bold espresso flavor perfectly balanced with sweetness.
Decadent chocolate crust adds a delightful twist that elevates the entire dessert.
Simple, straightforward steps make it easy to prepare, even for beginners!
Impressive enough to wow guests at any gathering—everyone will think you’re a pro!
Perfect for coffee lovers and dessert enthusiasts alike—who can resist that combo?
It’s a make-ahead dessert, letting you prepare it in advance and enjoy stress-free!
Versatile for any occasion, from casual dinners to fancy celebrations.
Tips for Success
Want to make sure your espresso cheesecake turns out absolutely perfect? I’ve got you covered with some tried-and-true tips that will have you feeling like a baking superstar!
Quality Ingredients Matter: Always use good-quality cream cheese and fresh espresso. Trust me, the flavor shines through when you use the best ingredients!
Don’t Skip Softening: Make sure your cream cheese is at room temperature before mixing. This makes it easier to beat and ensures a smooth filling. No lumps allowed!
Mix Gently: When adding the eggs, mix just until combined. Overmixing can incorporate too much air, making your cheesecake rise and then crack. We want a smooth, flat top!
Water Bath Optional: If you’re worried about cracks, you can bake your cheesecake in a water bath. Just wrap the bottom of your springform pan with aluminum foil and place it in a larger pan filled with water. It helps regulate the temperature!
Cooling is Key: Let your cheesecake cool gradually in the oven with the door ajar. This helps prevent sudden temperature changes that can lead to cracks.
Chill, Chill, Chill: Don’t rush the chilling process! Refrigerating for at least 4 hours (or overnight) allows the flavors to meld beautifully and gives you that perfect creamy texture.
Top It Off: Consider adding a sprinkle of chocolate shavings or a drizzle of chocolate sauce right before serving. It adds a gorgeous touch and extra flavor!
Follow these tips, and you’ll be well on your way to making an espresso cheesecake that will impress everyone at your table! You’ve got this!
Variations
If you’re feeling adventurous (or just want to mix things up a bit), there are so many fun ways to tweak this espresso cheesecake recipe to suit your taste! Here are some ideas that I absolutely love:
Nutty Crust: Swap out the graham cracker crust for a nut-based crust! You can use finely ground almonds or pecans mixed with melted butter for a deliciously crunchy alternative.
Flavored Espresso: Experiment with different flavors of espresso! A hazelnut or vanilla espresso can add a unique twist that complements the creamy filling beautifully.
Chocolate Ganache Topping: Drizzle some rich chocolate ganache over the top before serving for an extra layer of decadence—trust me, it takes the cheesecake to a whole new level!
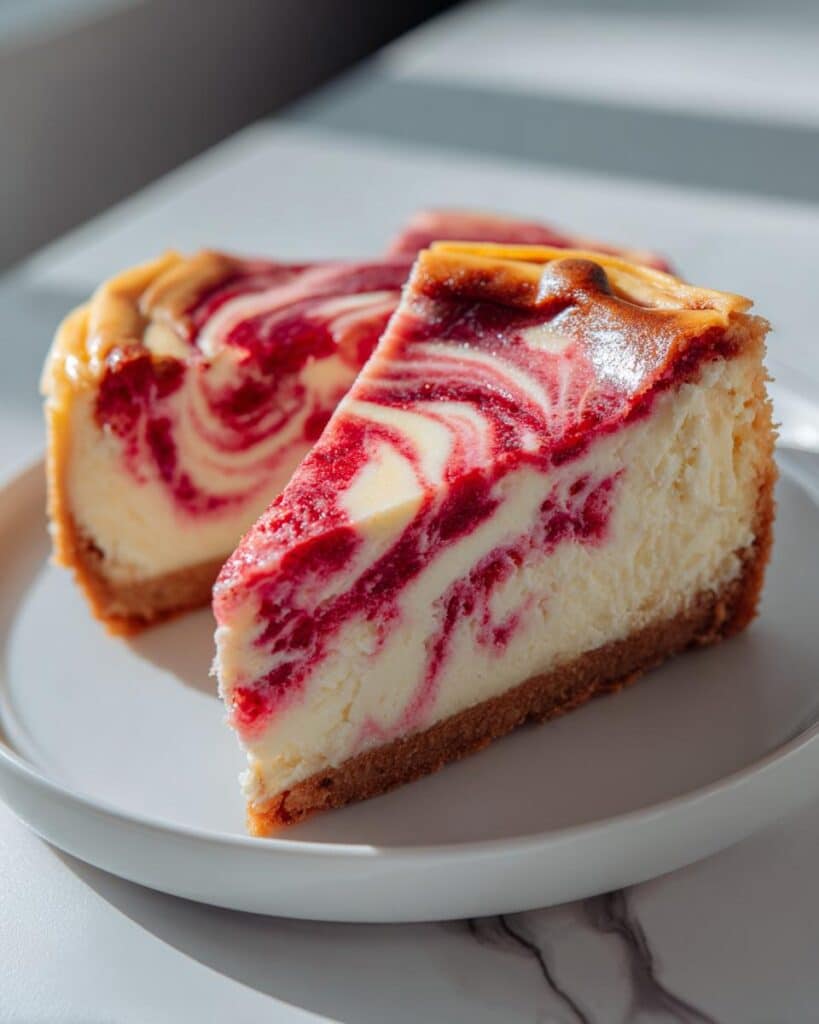
Fruit Swirl: For a fruity touch, consider swirling in some raspberry or strawberry puree into the cream cheese mixture before baking. It adds a lovely tartness that balances the richness.
Caramel Drizzle: Top your cheesecake with a delicious caramel sauce for a sweet, gooey finish—it’s like a little hug of flavor on top!
Mocha Delight: Mix in some cocoa powder or melted chocolate into the cream cheese filling for a deeper chocolate flavor that pairs beautifully with the espresso.
Spiced Variation: Add a pinch of cinnamon or a dash of nutmeg to the batter for a warm, spiced flavor that makes it feel even cozier.
These variations can bring new life to your espresso cheesecake while still keeping that delightful creaminess we all adore. So go ahead, get creative, and make it your own—you’ll be amazed at how deliciously unique each version can be!
Storage & Reheating Instructions
Got leftovers? No worries! Storing your espresso cheesecake properly will ensure it stays delicious for days to come. Here’s how to keep that creamy goodness fresh:
Refrigeration: Wrap the cheesecake tightly in plastic wrap or aluminum foil, or place it in an airtight container. It’ll keep well in the fridge for up to 5 days. Just make sure it’s chilled before wrapping to avoid condensation!
Freezing: If you want to save it for later, you can freeze the cheesecake! Slice it into individual portions and wrap each slice tightly in plastic wrap, then place them in a freezer-safe bag or container. It can last for up to 2 months in the freezer.
Thawing: When you’re ready to enjoy a slice, simply transfer it to the refrigerator for a few hours or overnight to thaw. This will help maintain its creamy texture without compromising flavor.
As for reheating, there’s really no need to warm it up—this cheesecake is best served chilled! If you’re set on warming it slightly, just be careful not to overheat it, as that can alter the delightful creaminess. A quick 10-15 seconds in the microwave should do it, but make sure to keep an eye on it!
Following these storage and reheating tips will help you savor every last bite of your espresso cheesecake, even days after you’ve made it. Enjoy your delicious creation!
Nutritional Information
Curious about what’s in this delicious espresso cheesecake? Here’s the estimated nutritional breakdown per slice (based on 12 servings):
Calories: 450
Fat: 30g
Saturated Fat: 15g
Unsaturated Fat: 10g
Trans Fat: 0g
Cholesterol: 100mg
Sodium: 300mg
Carbohydrates: 40g
Fiber: 2g
Sugar: 30g
Protein: 6g
Keep in mind that these values are estimates and can vary based on specific brands and ingredient choices. But wow, isn’t it nice to know you’re indulging in such a rich and satisfying dessert? Enjoy every creamy, coffee-infused bite!
FAQ Section
Can I use a different type of crust? Absolutely! If you’re not a fan of chocolate, a classic graham cracker crust works wonderfully too. Or, you can get creative with a nut-based crust using crushed almonds or pecans for a delicious twist!
What if I don’t have brewed espresso? No worries! You can substitute with strong brewed coffee. Just make sure it’s cooled before adding it to the cream cheese mixture. It won’t have the exact same flavor, but it will still be delicious!
Can I make this cheesecake ahead of time? Yes, this espresso cheesecake is perfect for making ahead! In fact, it tastes even better after chilling overnight. Just make sure to give it at least 4 hours in the fridge before serving for the best flavor and texture.
How do I know when the cheesecake is done baking? You want the edges to be set, but the center should still have a slight jiggle. It will firm up as it cools, so don’t worry if it seems a little wobbly when you pull it out of the oven!
What toppings pair well with espresso cheesecake? Oh, I love this question! You can’t go wrong with a sprinkle of chocolate shavings or a drizzle of caramel sauce. A dollop of whipped cream or a few fresh berries on the side can also add a nice pop of color and flavor!
I share easy, flavorful recipes that make home cooking simple, fun, and totally satisfying. Let's get in the kitchen and create something delicious together!


What do you think?
Share your thoughts, tips, or variations on this recipe!