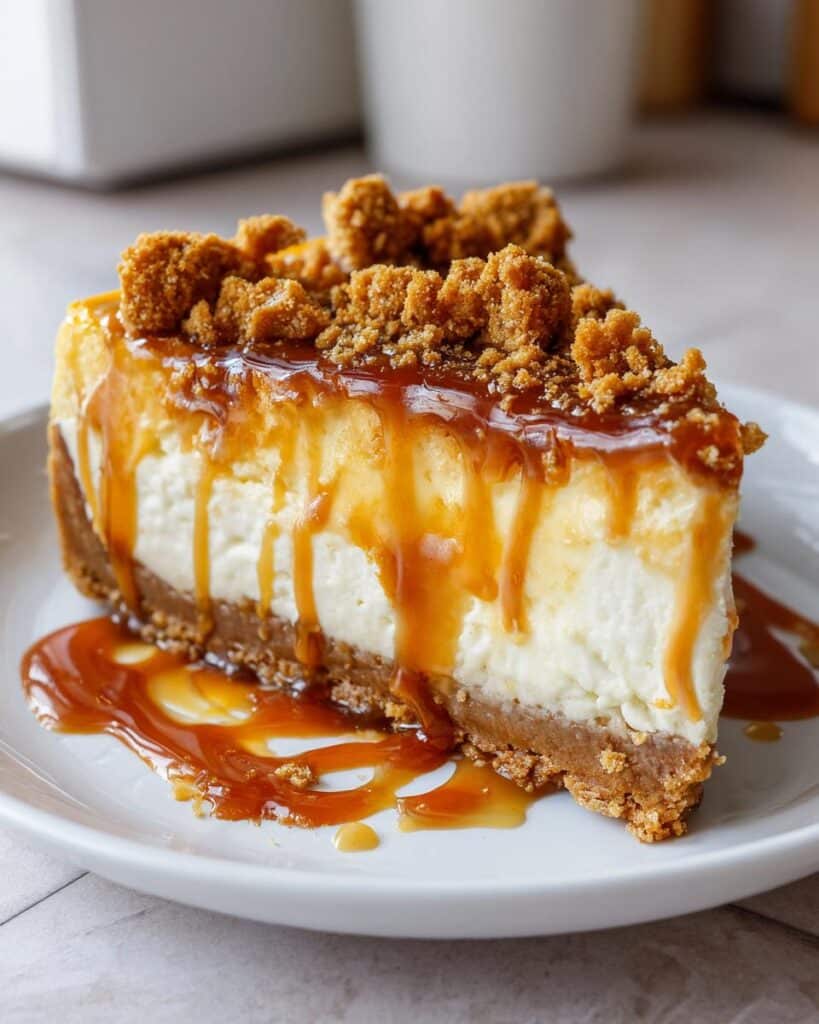
Oh my goodness, let me tell you about my Loaded Butterscotch Cheesecake! It’s like a slice of pure happiness on a plate. Imagine a rich, creamy texture that just melts in your mouth, topped with luscious butterscotch sauce that drizzles down like a sweet, golden river.
I first made this cheesecake for a family gathering, and I can still see the joy on everyone’s faces as they took their first bite. It quickly became a staple at our celebrations! This dessert is not just a treat; it’s a memory maker. Trust me, once you try it, you’ll find yourself craving it for every special occasion—or even just a cozy night in. Seriously, it’s that good!
Ingredients List
Here’s what you’ll need to whip up this dreamy Loaded Butterscotch Cheesecake. Make sure you have everything ready before you dive in—trust me, it makes the process so much smoother!
2 cups crushed graham crackers
1/2 cup unsalted butter, melted
1 cup sugar
3 (8 oz) packages cream cheese, softened to room temperature
1 teaspoon vanilla extract
3 large eggs
1 cup butterscotch chips
1/2 cup heavy cream
1/4 cup chopped nuts (optional, for a delightful crunch)
Having room temperature cream cheese is super important for a smooth and creamy filling, so don’t skip that step! Now, let’s get ready to make some magic happen!
Alright, let’s get into the good stuff! Making this Loaded Butterscotch Cheesecake is a little labor of love, but I promise it’s totally worth it. Just follow these steps, and you’ll have a show-stopping dessert that’s sure to impress!
Preheat and Prepare the Crust
First things first, you’ll want to preheat your oven to 325°F (160°C). This is super important because a properly heated oven ensures even baking. While that’s warming up, mix your crushed graham crackers and melted butter in a bowl until it’s all combined. It should look like wet sand! Now, grab your springform pan and press that mixture firmly into the bottom. You want a solid crust that can hold all that delicious filling, so don’t be shy—really pack it down!
Make the Cheesecake Filling
Now for the fun part! In a large mixing bowl, beat together the softened cream cheese and sugar until it’s smooth and creamy. You can use a hand mixer or stand mixer for this—whatever makes you happy! Next, add in the vanilla extract and the eggs, one at a time. Make sure to mix just until combined after each egg; we don’t want to overdo it. Now, melt those butterscotch chips until they’re gooey and smooth, and then fold them into the cream cheese mixture. Wow, just wait until you smell it—it’s heavenly!
Bake the Cheesecake
Pour that luscious filling over your prepared crust, and spread it out evenly. It’s going to look so good already! Pop it into the oven and bake for about 55-60 minutes. You’ll know it’s done when the edges are set, but the center still has a slight jiggle—like a gentle wave. Don’t worry, it’ll firm up as it cools!
Cooling and Serving Instructions
Once it’s done baking, remove it from the oven and let it cool in the pan for a little while. Then, carefully transfer it to the refrigerator and let it chill for at least 4 hours—ideally overnight for the best flavor. Just before you’re ready to serve, drizzle it generously with butterscotch sauce and sprinkle those chopped nuts on top if you’re using them. Trust me, this adds a delightful crunch that pairs perfectly with the creamy cheesecake!
Nutritional Information
Now, let’s talk about the numbers behind this decadent Loaded Butterscotch Cheesecake! Keep in mind that these values are estimates, but they’ll give you a good idea of what to expect. Each slice packs a punch of flavor and richness!
Calories: 350
Sugar: 25g
Fat: 24g
Saturated Fat: 12g
Unsaturated Fat: 8g
Trans Fat: 0g
Carbohydrates: 30g
Fiber: 1g
Protein: 5g
Cholesterol: 80mg
Sodium: 300mg
So, while it’s definitely a treat, it’s also a slice of happiness you won’t regret indulging in! Just remember to enjoy it in moderation, and you’ll be golden!
FAQ Section
I’ve gathered some of the most common questions folks ask about my Loaded Butterscotch Cheesecake. Let’s dive right in!
How do I store leftovers? If you happen to have any leftovers (which is rare, but let’s be real!), store them in an airtight container in the refrigerator. It’ll stay fresh for about 4-5 days. Just make sure to keep it covered to prevent any drying out!
Can this cheesecake be made ahead of time? Absolutely! In fact, I recommend making it a day ahead. The flavors really come together beautifully when it has some time to chill in the fridge. So, go ahead and make it the night before your event—your future self will thank you!
Can I use a gluten-free crust? Yes, you can! Just swap out the regular graham cracker crust for a gluten-free version. There are many delicious gluten-free graham cracker options out there, or you could even use crushed nuts or oats for a unique twist. It’ll still be fabulous!
What if I don’t have butterscotch chips? No worries! You can substitute with caramel chips for a slightly different flavor, or even chocolate chips if you’re in the mood for something a bit different. Just remember to melt them before mixing them in!
How do I know when the cheesecake is done baking? Great question! You’ll want to look for a set edge with a slightly jiggly center. It’ll firm up as it cools, so don’t be tempted to bake it longer than necessary. Trust me, that little jiggle is key to a creamy cheesecake!
Why You’ll Love This Recipe
Quick preparation time—whip it up in just 20 minutes!
Decadent, rich flavor that combines creamy cheesecake with luscious butterscotch.
Crowd-pleasing dessert that’s perfect for any gathering or special occasion.
Easy to customize with toppings like extra butterscotch sauce or chopped nuts.
It’s a delightful way to impress friends and family with minimal effort!
Leftovers (if there are any!) keep well in the fridge for a sweet treat later.
Ideal for both cheesecake lovers and those new to baking—everyone will adore it!
Tips for Success
Alright, my friend, here are some of my top tips to ensure your Loaded Butterscotch Cheesecake turns out perfectly every single time. Trust me, these little nuggets of wisdom will help you avoid any mishaps and elevate your dessert game!
Room Temperature Ingredients: Make sure your cream cheese and eggs are at room temperature before you start mixing. This helps create a smooth, lump-free batter that bakes beautifully.
Don’t Overmix: When adding the eggs, mix just until combined. Overmixing can introduce too much air and lead to cracks in your cheesecake. We want a smooth texture, not a bumpy ride!
Water Bath Method: If you’re worried about cracks, consider using a water bath! Just wrap your springform pan in aluminum foil to prevent leaks, and place it in a larger baking dish filled with hot water while it bakes. It creates a gentle steam that helps the cheesecake bake evenly.
Let It Cool Gradually: After baking, let your cheesecake cool in the pan for about an hour before transferring it to the fridge. This gradual cooling helps prevent cracks. Then, chill it well—overnight is best for those flavors to really meld together!
Serve Chilled: Cheesecake is best served chilled, so make sure to give it enough time in the fridge. Just before serving, drizzle with extra butterscotch sauce and sprinkle some chopped nuts for that added touch of decadence!
Presentation Matters: When slicing, use a hot knife (dipped in hot water and wiped dry) for clean cuts. This helps your slices look gorgeous and tempting!
With these tips in your back pocket, you’ll be a Loaded Butterscotch Cheesecake pro in no time! Enjoy every creamy, delicious bite!
Variations
One of the best things about my Loaded Butterscotch Cheesecake is how easy it is to customize! Here are a few delightful variations to inspire your creativity:
Chocolate Lovers: Swap out the butterscotch chips for chocolate chips for a rich chocolate cheesecake. You can even drizzle some melted chocolate on top for an extra indulgent touch!
Nutty Delight: Add a generous handful of chopped nuts like pecans or walnuts into the filling for a crunchy texture. You can also use a nut-based crust instead of graham crackers for a unique twist.
Fruity Freshness: Top your cheesecake with fresh fruit like sliced strawberries, bananas, or blueberries. The tartness of the fruit balances beautifully with the creamy sweetness of the cheesecake—yum!
Caramel Swirl: For an extra layer of flavor, swirl some caramel sauce into the cheesecake filling before baking. It creates a beautiful marbled effect and enhances that sweet, buttery goodness.
Spiced Up: Add a pinch of cinnamon or nutmeg to the filling for a warm, spiced flavor. This is especially lovely during the fall months when you want something cozy!
Cheesecake Bites: Make mini versions using a muffin tin instead of a springform pan. They’re perfect for parties or just when you want a smaller treat!
Feel free to mix and match these ideas—you really can’t go wrong! Each variation brings a new twist, making this Loaded Butterscotch Cheesecake a delightful canvas for your creativity.
Storage & Reheating Instructions
Alright, let’s talk about how to keep your Loaded Butterscotch Cheesecake fresh and delicious for as long as possible! If you’re lucky enough to have leftovers (which I hope you do, because it’s amazing!), here’s what you need to know:
Refrigeration: Store your cheesecake in an airtight container in the fridge. It’ll stay fresh for about 4-5 days. Just make sure it’s well covered to prevent it from drying out or absorbing any fridge odors.
Freezing: If you want to keep it longer, you can freeze your cheesecake! Wrap individual slices tightly in plastic wrap and then place them in a freezer-safe container or bag. It’ll last for up to 2 months in the freezer. When you’re ready to enjoy, just transfer a slice to the fridge to thaw overnight. Easy peasy!
Now, if you’re craving a warm slice (I get it!), you can gently reheat it in the microwave. Just pop it in for about 15-20 seconds at a time until it’s warmed through. But honestly, I think it’s best served chilled! That creamy texture and rich flavor really shine when it’s cool. So, whether you’re enjoying it fresh or from the fridge, you’re in for a treat!
I share easy, flavorful recipes that make home cooking simple, fun, and totally satisfying. Let's get in the kitchen and create something delicious together!


What do you think?
Share your thoughts, tips, or variations on this recipe!