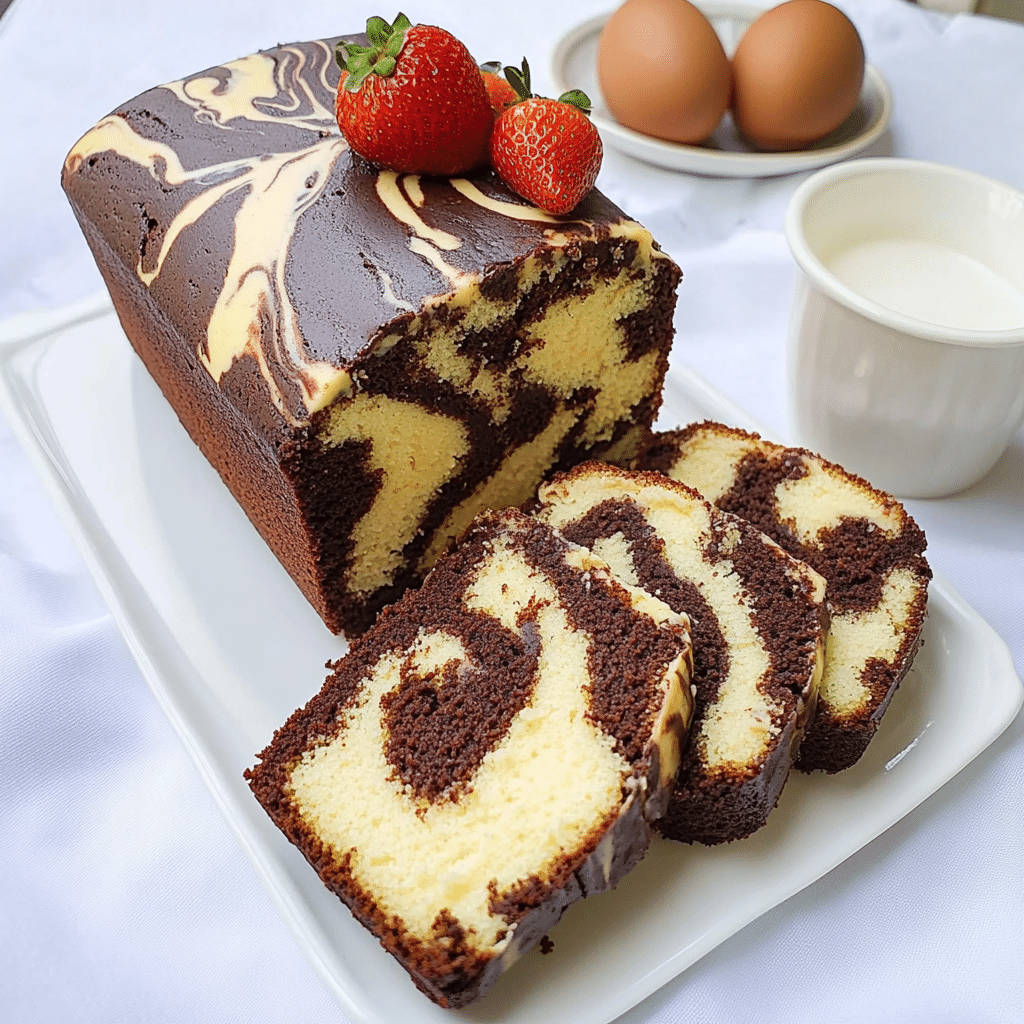
There’s something incredibly nostalgic and comforting about slicing into a homemade marble pound cake. With its beautiful swirl of vanilla and chocolate layers, this cake isn’t just eye-catching—it’s also rich, buttery, and deliciously moist. Whether you’re planning a weekend dessert or prepping for a special occasion, this recipe delivers the perfect balance of simplicity and elegance.
In this guide, we’ll explore everything you need to know to bake the perfect marble pound cake—from ingredients and step-by-step instructions to pro tips, variations, and FAQs. You’ll also find essential baking tools, serving ideas, and nutritional details to make your baking journey even easier. Check out this Southern classic twist: Butter Pecan Pound Cake – A Southern Classic You’ll Fall In Love With.
Let’s dive into the delicious world of marble pound cakes.
What Is a Marble Pound Cake Recipe?
History and Origin of Marble Cakes
The marble cake has European roots—particularly from Germany—where bakers would blend light and dark batters together for a visually striking dessert. This dual-flavor approach traveled to America in the 19th century and became a staple in homes where simplicity met indulgence. The marble effect itself is now a classic technique, showing off a baker’s finesse while keeping things fun.
The name “pound cake” originates from its original measurements—one pound each of butter, sugar, flour, and eggs. This old-fashioned formula created a dense yet moist texture that became iconic. Over time, the recipe has evolved with added flavors, like chocolate, to give us the much-loved marble pound cake recipe.
Difference Between Pound Cake and Regular Cake
While both are sweet and satisfying, there are key differences:
Feature
Pound Cake
Regular Cake
Texture
Dense and buttery
Light and airy
Fat Content
Higher (butter-heavy)
Can vary; may use oil or less butter
Mixing Method
Creaming method
May use all-in-one or reverse creaming
Shelf Life
Longer (high fat preserves moisture)
Shorter without preservatives
Pound cakes hold their shape well, making them perfect for swirls and marbled patterns. The richness also makes it ideal for serving plain or lightly glazed.
Ingredients You’ll Need for a Perfect Marble Pound Cake
Creating a show-stopping marble pound cake recipe starts with the right ingredients. Each element plays a crucial role in the cake’s moisture, flavor, and texture. Below, we break down the essentials and a few optional upgrades to elevate your baking.
Now that you’ve got your ingredients ready, it’s time to turn them into a delicious, bakery-worthy marble pound cake. This step-by-step process ensures every swirl is picture-perfect and every bite is moist and flavorful.
Prepping the Batter: Mixing Vanilla and Chocolate Layers
Start by preheating your oven to 325°F (163°C) and greasing your baking pan (loaf, bundt, or tube).
1. Cream butter and sugar Using a stand mixer or hand mixer, cream the softened butter and granulated sugar together on medium speed for 4–5 minutes. The mixture should be fluffy and pale in color.
2. Add eggs one at a time Add in the eggs, one at a time, beating well after each addition. This step helps create a uniform batter.
3. Add dry ingredients and vanilla Gradually mix in the sifted flour and salt, alternating with any optional sour cream or buttermilk. Finish with vanilla extract for flavor.
4. Prepare the chocolate batter In a separate bowl, mix ¼ of the vanilla batter with 2 tablespoons of cocoa powder and 1 tablespoon of hot milk or water. Stir until smooth. This becomes your chocolate swirl.
Creating the Marble Effect: Swirl Like a Pro
Now the fun part: marbling!
Pour half the vanilla batter into your prepared pan.
Add spoonfuls of chocolate batter on top.
Layer the remaining vanilla batter over the top.
Use a butter knife or skewer to gently swirl through the batter. Don’t overdo it—you want defined swirls, not a chocolate-vanilla mush.
The goal is contrast and beauty with each slice.
Baking Time and Temperature Tips
Bake your cake at 325°F (163°C) for 60–75 minutes, depending on your pan type.
Pan Type
Bake Time
Notes
Loaf Pan
60–65 min
Check at 55 min with a toothpick
Bundt Pan
70–75 min
Holds heat well, gives elegant look
Tube Pan
65–70 min
Classic pound cake shape
Check for doneness: Insert a toothpick in the center—it should come out clean or with a few moist crumbs.
Cool the cake in the pan for 10 minutes, then transfer to a wire rack to cool completely.
Expert Tips to Make the Best Marble Pound Cake Every Time
Even a simple marble pound cake recipe can go sideways without a few expert tricks. Whether you’re baking for the first time or fine-tuning your technique, these pro tips will guarantee better results every time.
How to Keep Pound Cake Moist
Dry pound cake is a baker’s worst nightmare. Luckily, a few small adjustments can make a big difference.
Use room temperature ingredients: This helps everything emulsify properly for a smooth, moist batter.
Add sour cream or yogurt: Their fat and acidity lock in moisture without making the cake too wet.
Don’t overbake: Remove the cake from the oven as soon as a toothpick comes out with a few crumbs. Overbaking dries it out quickly.
Wrap while warm: Wrap the cooled cake in plastic wrap and let it rest overnight for improved flavor and texture.
Moisture retention is key, especially when you want to store your cake for a few days without losing that soft bite.
Common Mistakes to Avoid When Baking
Even experienced bakers trip up on these common issues:
Mistake
Why It Happens
Fix
Overmixing the batter
Too much gluten forms, making it tough
Mix until just combined
Uneven swirling
Too much swirling blends layers
Swirl gently in one or two S-shaped motions
Cake sticks to the pan
Inadequate greasing
Grease + flour the pan or use baking spray with flour
Dome-shaped cake
Oven too hot
Stick to 325°F for even rise
Avoiding these errors will keep your cake light, tender, and visually stunning.
Storage and Freezing Tips for Longer Freshness
Want to make your marble pound cake ahead? Here’s how to store it properly:
Room Temperature: Wrap in foil or plastic wrap. Keeps fresh for 3–4 days.
Refrigerator: Store in an airtight container for up to 7 days. Bring to room temp before serving.
Freezer: Slice and wrap individual pieces. Freeze up to 3 months. Thaw at room temperature or microwave in short bursts.
Pro Storage Tip: Place a paper towel inside the container to absorb moisture and prevent sogginess.
Variations of Marble Pound Cake Recipe to Try
One of the best things about a marble pound cake recipe is how versatile it can be. With just a few tweaks, you can transform this classic dessert into something even more indulgent, diet-friendly, or holiday-worthy. Here are some creative variations to suit every taste and occasion.
Chocolate Chip Marble Pound Cake
If you’re a chocolate lover, this version is a no-brainer.
How to make it: Fold ½ cup of mini semi-sweet chocolate chips into both the vanilla and chocolate batters before marbling.
Why it works: The chips melt slightly during baking, giving extra pockets of chocolatey goodness.
Pro tip: Toss chips in 1 tsp of flour before folding them in—this prevents them from sinking.
The result? A rich, textured cake that’s perfect for birthdays, bake sales, or weekend treats.
Keto or Gluten-Free Versions
Yes, you can still enjoy a marble pound cake even if you’re avoiding carbs or gluten.
Dietary Need
Substitutes
Notes
Keto
Almond flour + monk fruit sweetener
Add extra eggs for structure
Gluten-Free
1:1 gluten-free baking flour
Make sure it includes xanthan gum
Dairy-Free
Use plant-based butter + almond yogurt
Slightly different texture, still rich
These versions are health-conscious but still deliver on taste and appearance.
Loaf Pan vs Bundt Pan vs Sheet Pan Differences
Your choice of baking pan can change the outcome dramatically.
Loaf Pan (9×5″): Classic presentation, perfect for easy slicing. Great for gifting.
Bundt Pan: Adds visual flair with intricate shapes. Requires careful greasing but makes a stunning centerpiece.
Sheet Pan: Less common but great for bite-sized marble cake squares. Bakes faster.
Tip: Always adjust your baking time based on the pan’s material and depth.
Once you’ve nailed your marble pound cake recipe, it’s time to make it shine with the right pairings and presentation. Here are quick ideas to serve it like a pro.
Drinks That Pair Perfectly
Coffee or Espresso: Cuts through the richness. Great for breakfast or brunch.
Milk: A classic combo—perfect for kids and adults.
Hot Tea: Earl Grey or Chai adds spice and depth.
Dessert Wine: Serve warm cake with sweet wine for a luxe twist.
Easy Toppings & Glazes
Chocolate Ganache: Melt cream + dark chocolate and drizzle it on.
Lemon Glaze: Mix powdered sugar with lemon juice for a fresh zing.
Whipped Cream & Berries: Add a dollop and a few strawberries for a fancy look.
Simple Ways to Serve
For brunch: Slice and serve with fruit and coffee.
For holidays: Use a bundt pan, dust with powdered sugar.
For gifting: Wrap slices in parchment, tie with ribbon.
Small touches like a warm plate or pretty topping can take this classic to a whole new level.
Nutrition Facts and Calorie Breakdown of Marble Pound Cake
Enjoying a slice of your favorite marble pound cake recipe doesn’t mean throwing nutrition out the window. Here’s a quick look at what’s in one slice—and how you can lighten it up.
Average Nutritional Values (Per Slice)
Calories: 350
Fat: 20g
Sugar: 25g
Protein: 5g
Carbs: 38g
It’s a rich dessert, but still reasonable when enjoyed in moderation.
Easy Swaps for a Lighter Version
Butter → Greek Yogurt (half and half): lowers fat
Sugar → Coconut Sugar or Monk Fruit: cuts calories
These swaps keep your cake moist and flavorful while making it a bit healthier.
How It Compares to Other Cakes
Cake
Calories
Marble Pound Cake
350
Angel Food Cake
140
Chocolate Cake
420
Banana Bread
300
It’s richer than some but much less heavy than others—especially if you skip the glaze.
Baking Tools and Equipment You’ll Need
Before diving into your next marble pound cake recipe, make sure your kitchen is stocked with the right tools. Using proper equipment can make your baking smoother, your swirls more defined, and your cake perfectly baked every time.
Must-Have Tools for This Recipe
You don’t need a bakery’s kitchen—just these essentials:
Stand Mixer or Hand Mixer: For creaming butter and sugar until fluffy. Hand mixing works in a pinch but takes longer.
Mixing Bowls (2–3): One for the vanilla batter, one for chocolate, and one for dry ingredients.
Rubber Spatula: Great for folding and scraping without overmixing.
9×5″ Loaf Pan or Bundt Pan: Both give excellent results. Loaf for classic, bundt for a showstopper.
Toothpicks or Skewer: Test doneness and swirl batters with precision.
Alternatives if You Don’t Own a Mixer
If you’re baking without an electric mixer:
Use a whisk: It takes effort, but it’ll work if the butter is super soft.
Mash and beat by hand: Mix butter and sugar until it lightens in color—this is key.
Use warm bowls: Slightly warm metal bowls help soften butter and speed up mixing.
Best Pans for Even Baking and Browning
Choosing the right pan can make or break your marble pattern.
Pan Type
Pros
Notes
Metal Loaf Pan
Even heat, classic shape
Avoid dark pans—they brown too fast
Glass Pan
Good for slow baking
May need longer time
Bundt Pan
Elegant look, dramatic swirls
Grease thoroughly to prevent sticking
Always grease your pan with butter + flour or use baking spray with flour to avoid broken cakes.
Frequently Asked Questions About Marble Pound Cake Recipe
Before you start baking—or if you’ve had trouble getting it just right—these answers to the most common questions about the marble pound cake recipe will help troubleshoot and perfect your cake every time.
How do you keep a marble cake moist?
Moisture comes from using enough fat (like butter or sour cream), not overbaking, and storing it properly. Wrap your cake in plastic wrap once it’s cooled, and avoid slicing until ready to serve. A bit of Greek yogurt or oil in the batter also helps lock in moisture.
Can I use oil instead of butter in a pound cake?
Yes, you can, but the flavor and texture will change. Butter gives richness and structure, while oil makes the cake slightly more tender. For best results, try a half-butter, half-oil combo.
Why is my pound cake dry and crumbly?
This usually happens from overbaking or overmixing. Stick to low oven temps like 325°F and mix just until combined. Also, too much flour (especially if you scoop instead of spoon-measuring) can dry things out.
Is sour cream or yogurt better in pound cake?
Both work great, but sour cream is richer and gives more tang, while Greek yogurt is slightly lighter and higher in protein. Use whichever suits your taste and pantry.
What makes a pound cake rise better?
Pound cakes rely on proper creaming of butter and sugar to create lift. Make sure ingredients are at room temperature, and beat long enough to incorporate air into the batter. You can also add a small amount of baking powder for extra rise, though traditional recipes don’t use it.
Can marble pound cake be frozen after baking?
Yes! Cool it completely, wrap tightly in plastic and foil, and freeze for up to 3 months. Thaw at room temperature or warm slices gently in the microwave. Freezing doesn’t affect texture if wrapped properly.
Conclusion
The classic marble pound cake recipe is more than just a dessert—it’s a nostalgic favorite with timeless appeal. With its buttery texture, rich flavor, and eye-catching swirls, it’s perfect for casual snacking, holidays, brunch spreads, or thoughtful gifting. Whether you’re a beginner baker or a kitchen pro, this guide gives you all the steps, tips, and tools to create your best marble cake ever.
I share easy, flavorful recipes that make home cooking simple, fun, and totally satisfying. Let's get in the kitchen and create something delicious together!


What do you think?
Share your thoughts, tips, or variations on this recipe!