Oh my goodness, have you ever tried red velvet cheesecake brownies? They’re like a match made in dessert heaven! Imagine rich, fudgy red velvet brownies, and then—bam!—you get a luscious layer of creamy cheesecake on top. It’s a flavor explosion that’s just so indulgent and perfect for any occasion. I remember the first time I made these for a gathering; everyone couldn’t stop raving about them! They’re not just gorgeous with that stunning red color, but trust me, when you bite into them, the combination of chocolatey goodness and creamy cheesecake will have you hooked. So, let’s dive into this delightful treat that’s sure to impress your friends and family—just don’t blame me if they keep asking for seconds!
Ingredients List
1 cup all-purpose flour
1/2 cup unsweetened cocoa powder
1 cup granulated sugar
1/2 cup unsalted butter, melted
2 large eggs
1 teaspoon vanilla extract
1 tablespoon red food coloring
8 oz cream cheese, softened
1/4 cup powdered sugar
1 egg (for the cheesecake layer)
How to Prepare Red Velvet Cheesecake Brownies
Prepping the Oven and Baking Dish
First things first, let’s get that oven preheated to 350°F (175°C). Trust me, you want that heat to be just right for baking these beauties! While that’s warming up, grab an 8×8-inch baking dish and grease it well with butter or cooking spray. I like to use parchment paper too—just line the bottom and sides for an easy lift later. This way, your brownies won’t stick, and you can get those perfect squares out without a hitch!
Mixing the Brownie Batter
Now, let’s dive into mixing that decadent brownie batter! In a medium bowl, whisk together the all-purpose flour, cocoa powder, and granulated sugar until they’re nicely combined. Then, add in your melted butter, eggs, vanilla extract, and the red food coloring. I like to use a spatula here to fold everything together; it’s less messy! The batter should be thick and glossy—if it’s not, just give it a little more love until everything is well-mixed and there are no dry streaks left. Wow, that color is just stunning!
Next up, we’re going to create that creamy cheesecake layer that takes these brownies to the next level! In a separate bowl, beat the softened cream cheese until it’s nice and smooth—no one wants lumps in their cheesecake! Then, add the powdered sugar and that extra egg. Mix everything together until it’s velvety and fluffy. You want it to be smooth and easily spreadable, so don’t rush this step; take your time to achieve that dreamy consistency.
Layering the Brownies
Time to layer it all up! Start by spreading half of the brownie batter into your prepared baking dish, smoothing it out evenly. Then, carefully dollop the cheesecake mixture on top and gently spread it out—be careful not to mix it in too much! Finally, spoon the remaining brownie batter over the cheesecake layer. It’s okay if it’s not perfectly even; a little swirly action can be fun and pretty! Just make sure to cover the cheesecake completely.
Baking and Cooling
Now, pop those layers into the oven and let them bake for about 25-30 minutes. You’ll know they’re done when a toothpick inserted in the center comes out clean or with just a few moist crumbs. Oh, the smell will be heavenly! Once baked, take them out and let them cool in the pan for about 10 minutes, then transfer them to a wire rack to cool completely. Patience is key here—let them cool fully before cutting into squares, so you get those perfect edges. Trust me, the wait is worth it!
Why You’ll Love This Recipe
Decadent combination of rich red velvet brownies and creamy cheesecake.
Visually stunning with that vibrant red color—perfect for impressing guests!
Easy to make with straightforward ingredients and simple steps.
Great for any occasion, from casual get-togethers to fancy celebrations.
Can be made ahead of time, so you can enjoy stress-free entertaining.
Perfectly fudgy texture that melts in your mouth—seriously addictive!
Kids and adults alike will rave about these delicious treats!
Tips for Success
Alright, let’s make sure your red velvet cheesecake brownies turn out absolutely perfect! Here are some of my tried-and-true tips to avoid any hiccups along the way:
Measure Carefully: Baking is a science, so make sure to measure your ingredients accurately. Too much flour or sugar can change the texture dramatically!
Room Temperature Ingredients: For the best results, bring your cream cheese and eggs to room temperature. This helps them blend together smoothly without lumps.
Don’t Overmix: When combining the brownie and cheesecake batters, mix just until the ingredients are incorporated. Overmixing can lead to tough brownies—yikes!
Watch the Baking Time: Ovens can vary, so start checking your brownies at the 25-minute mark. If the toothpick test shows a few moist crumbs, you’re golden!
Let Them Cool: Patience is key! Allow your brownies to cool completely in the pan before cutting. This ensures nice, clean edges and keeps the cheesecake layer intact.
Experiment with Toppings: Feel free to get creative! A drizzle of chocolate or a sprinkle of nuts on top can elevate these brownies even more.
Store Properly: Keep any leftovers in an airtight container in the fridge. They’ll stay fresh for about a week—but trust me, they won’t last that long!
Follow these tips, and you’ll be on your way to baking up a batch of brownies that’ll wow anyone who tries them—your friends and family will be begging for the recipe! Enjoy the process and happy baking!
Variations of Red Velvet Cheesecake Brownies
Alright, let’s talk about how you can mix things up with these delightful red velvet cheesecake brownies! The beauty of this recipe is its versatility—you can change up flavors and toppings to suit your mood or occasion. Here are some of my favorite variations:
White Chocolate Swirl: Melt some white chocolate and add it to the cheesecake layer for a sweet twist. You can also fold in chunks of white chocolate for extra sweetness!
Nutty Crunch: Add chopped walnuts or pecans to the brownie batter for a delightful crunch. They add a nice texture and a bit of nuttiness that pairs beautifully with the chocolate.
Mint Chocolate: Mix in a few drops of peppermint extract to the cheesecake layer for a refreshing minty flavor. Top with crushed mint chocolate candies for that extra flair!
Berry Bliss: Swirl in some raspberry or strawberry puree into the cheesecake layer before baking. The tartness from the berries complements the sweetness of the brownies perfectly!
Chocolate Chip Delight: Fold in some semi-sweet chocolate chips into the brownie batter for an extra gooey chocolate experience. You can never go wrong with more chocolate, right?
Spiced Up: Add a sprinkle of cinnamon or nutmeg to the brownie batter for a warm, spiced flavor that’s perfect for cozy gatherings—especially during fall!
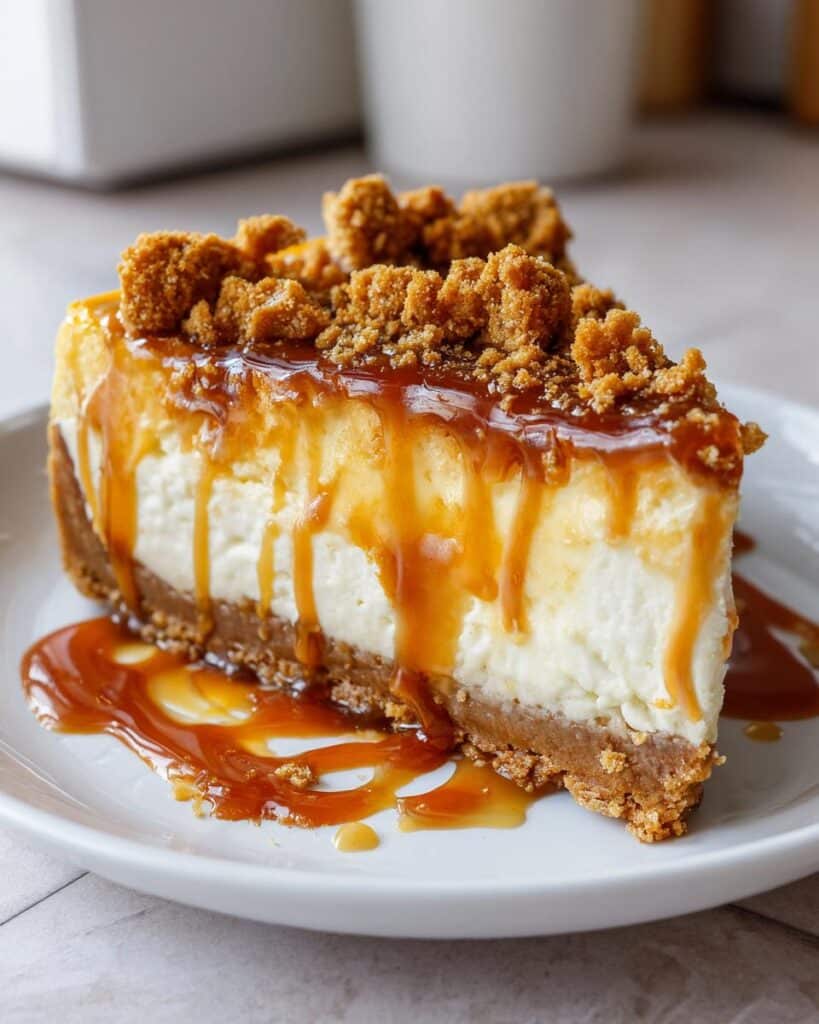
Caramel Drizzle: Once baked and cooled, drizzle some warm caramel sauce over the top for a decadent finish that takes these brownies over the top.
Get creative with these variations, and don’t be afraid to experiment! Each twist brings a whole new life to these already fabulous brownies. I can’t wait to hear what delicious combinations you come up with!
Nutritional Information
Alright, let’s break down the numbers for these delicious red velvet cheesecake brownies! Here’s the estimated nutritional information for one brownie, just to keep you in the know:
Calories: 250
Fat: 12g
Saturated Fat: 7g
Unsaturated Fat: 4g
Trans Fat: 0g
Cholesterol: 50mg
Sodium: 150mg
Carbohydrates: 34g
Sugar: 20g
Fiber: 1g
Protein: 3g
Keep in mind that these values are estimates and can vary based on the specific ingredients you use. But hey, it’s good to know what you’re indulging in, right? Enjoy every bite of these decadent brownies, and remember: life is all about balance! Happy baking!
Serving Suggestions
Now that you’ve whipped up these gorgeous red velvet cheesecake brownies, let’s talk about how to serve them for maximum enjoyment! Trust me, the right pairings can elevate your dessert experience to a whole new level. Here are some of my favorite ideas:
Vanilla Ice Cream: A scoop of creamy vanilla ice cream on the side is always a hit! The cold, creamy texture perfectly complements the rich brownies.
Whipped Cream: A dollop of freshly whipped cream on top adds a light, airy contrast to the dense brownies. You can even sprinkle some cocoa powder or chocolate shavings on top for a little flair!
Fresh Berries: Serve with a side of fresh strawberries or raspberries for a fruity touch. The tartness of the berries balances the sweetness beautifully.
Chocolate Sauce: Drizzle some warm chocolate sauce over the brownies for that extra indulgence. Who can resist a little more chocolate, right?
Coffee or Espresso: A cup of freshly brewed coffee or espresso pairs wonderfully with these brownies. The bitterness of the coffee complements the sweetness perfectly!
Milk: Don’t underestimate a cold glass of milk—classic and delightful! It’s the perfect dip for those fudgy brownie edges.
Cream Cheese Frosting: If you’re feeling extra indulgent, spread some cream cheese frosting on top for an over-the-top treat. It’ll be like a dessert within a dessert!
Feel free to mix and match these suggestions based on your mood or the occasion! No matter how you serve them, these red velvet cheesecake brownies are sure to steal the show. Enjoy every delicious bite!
Storage & Reheating Instructions
So, you’ve made these scrumptious red velvet cheesecake brownies, and now you’ve got some leftovers (if you’re lucky!). Here’s how to store them properly so they stay just as delicious as the day you baked them:
Cool Completely: First, make sure the brownies have cooled completely before storing. This prevents condensation, which can make them soggy.
Airtight Container: Place the brownies in an airtight container. You can layer them with parchment paper between each layer to keep them from sticking together.
Refrigeration: Store them in the fridge if you plan to keep them for more than a day or two. They’ll stay fresh for about a week—though I doubt they’ll last that long!
Freezing: If you want to keep them longer, you can freeze the brownies! Just wrap each square tightly in plastic wrap and then place them in a freezer-safe bag. They’ll stay good for up to 2 months. When you’re ready to enjoy, thaw them in the fridge overnight.
Now, when it comes to reheating, you’ll want to warm them up just enough to bring back that fudgy goodness:
Microwave: Pop a brownie in the microwave for about 10-15 seconds—just enough to take the chill off. Be careful not to overheat them, or they may dry out!
Oven: For a more even heat, preheat your oven to 350°F (175°C) and warm the brownies for about 5-10 minutes. This method restores that lovely texture, making them feel freshly baked again.
And there you have it! Follow these storage and reheating tips, and you can savor every last bite of your red velvet cheesecake brownies for days to come. Enjoy!
I share easy, flavorful recipes that make home cooking simple, fun, and totally satisfying. Let's get in the kitchen and create something delicious together!


What do you think?
Share your thoughts, tips, or variations on this recipe!