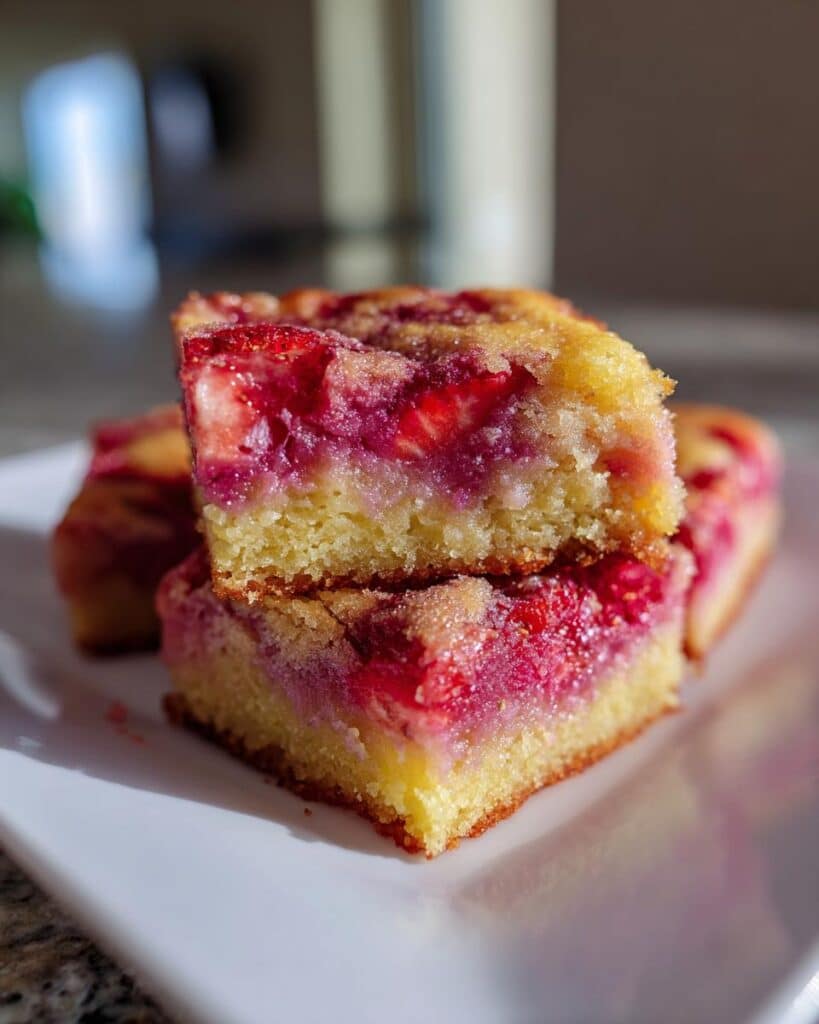
Oh, let me tell you about traditional thumb bars! These delightful treats are like a warm hug for your taste buds, with a buttery crumbly base and a sweet, fruity filling that just sings when you take a bite. They’re the kind of dessert that brings back fond memories of family gatherings and cozy afternoons. What I love most is how easy they are to whip up, making them a perfect go-to for any occasion. Whether you’re looking to impress guests or just craving a little something sweet, these thumb bars deliver on flavor and nostalgia. Seriously, you won’t believe how quickly they disappear! So, grab your favorite jam, and let’s dive into this scrumptious recipe for traditional thumb bars that you’ll want to make again and again.
Ingredients List
To create these mouthwatering traditional thumb bars, you’ll need some simple ingredients that come together beautifully. Here’s what you’ll gather:
1 cup all-purpose flour: This is the backbone of your crust, providing the perfect texture.
1/2 cup unsalted butter, softened: Make sure it’s at room temperature for easy mixing—this adds rich flavor!
1/2 cup granulated sugar: For that classic sweetness that balances everything out.
1/4 cup brown sugar: This gives a lovely depth and a hint of caramel flavor.
1/4 teaspoon salt: Just a pinch to enhance all the flavors.
1/2 teaspoon vanilla extract: Trust me, vanilla elevates the entire dish with its warm aroma.
1/2 cup fruit jam of your choice: The star of the show! Choose your favorite flavor to customize your bars.
With these ingredients on hand, you’re well on your way to baking up a batch of thumb bar happiness!
Now, let’s get to the fun part—making these delicious traditional thumb bars! Follow along with these simple steps, and you’ll have a sweet treat ready in no time.
Preheat your oven: First, set your oven to 350°F (175°C). This is key, as a properly heated oven ensures even baking.
Mix the dry ingredients: In a mixing bowl, combine the flour, softened butter, granulated sugar, brown sugar, salt, and vanilla extract. I like to use a fork or my hands to mix until the texture is crumbly—don’t worry if it feels a bit sandy!
Press the base: Take half of this crumbly mixture and firmly press it into the bottom of a greased baking dish. Make sure it’s even, or you might find some parts overcooked while others are underdone.
Add the jam: Spread your chosen fruit jam evenly over the pressed mixture. Go all the way to the edges to ensure every bite is packed with flavor!
Top it off: Sprinkle the remaining crumb mixture over the jam. This creates that delightful topping we all love.
Bake: Pop your dish into the preheated oven and bake for 25-30 minutes. You’ll know they’re ready when the top is golden brown and your kitchen is filled with the most heavenly aroma.
Cool and cut: Once baked, let your thumb bars cool in the dish for a bit before cutting them into squares. This helps them set up nicely and makes cutting easier.
And there you have it! In just about 45 minutes, you’ll have a batch of traditional thumb bars that are as delightful to look at as they are to eat. Happy baking!
Why You’ll Love This Recipe
Quick and easy to prepare, making it perfect for busy days.
Deliciously sweet with a buttery crumb that melts in your mouth.
Versatile—use any fruit jam you love to create your own flavor combinations!
Great for sharing at gatherings or simply enjoying with a cup of tea.
These thumb bars are a nostalgic treat that brings everyone together.
Tips for Success
To make your traditional thumb bars truly shine, here are some pro tips you won’t want to miss! First, make sure your butter is softened but not melted; this helps create that perfect crumbly texture. If you find the mixture is too dry, a splash of milk can help bring it together without compromising the flavor.
Also, don’t skip the cooling step after baking—this allows the bars to set properly and makes cutting them into neat squares so much easier. If you want to add a little flair, consider sprinkling some flaky sea salt on top right after they come out of the oven for a sweet and salty contrast. Lastly, feel free to experiment with different jams; raspberry and apricot are my personal favorites, but the sky’s the limit! Happy baking, and enjoy those delicious thumb bars!
Variations
One of the best things about traditional thumb bars is how versatile they can be! If you’re feeling adventurous, try swapping out the fruit jam for something a little different—think lemon curd for a zesty kick or Nutella for a rich, chocolaty twist. You could even mix two types of jam for a fun flavor explosion!
If you like a bit of crunch in your dessert, consider adding some chopped nuts, like walnuts or pecans, to the crumb mixture. Just toss in about 1/4 cup for an extra layer of texture and flavor. And if you’re in the mood for something seasonal, how about incorporating some pumpkin spice into the base? Just a teaspoon or two will give your thumb bars a delightful autumn vibe!
Feel free to get creative—the possibilities are endless, and each variation brings its own special touch to these delightful treats!
Nutritional Information
Here’s a quick look at the estimated nutritional data for each traditional thumb bar, so you know what you’re indulging in! Each bar contains approximately 150 calories, 7g of fat, 2g of protein, and 21g of carbohydrates. Keep in mind that these numbers are estimates and can vary based on the specific ingredients you use, especially the type of jam. Enjoy your treats in moderation, and savor every bite!
Storage & Reheating Instructions
To keep your traditional thumb bars fresh and delicious, store them in an airtight container at room temperature for up to 5 days. If you think you won’t finish them that quickly (though I doubt it!), you can refrigerate them for up to a week. Just be sure to let them come to room temperature before enjoying again. If you’d like to reheat them, a quick pop in the microwave for about 10-15 seconds should do the trick. This will warm them up nicely while keeping that lovely crumbly texture intact. Enjoy your sweet treats any time you like!
FAQ Section
I often get questions about these scrumptious traditional thumb bars, so let’s dive into some of the most common ones!
Can I use homemade jam? Absolutely! Homemade jam can add a personal touch and unique flavor to your thumb bars. Just make sure it’s thick enough to spread easily.
What if I don’t have all-purpose flour? No worries! You can substitute it with whole wheat flour for a nuttier flavor, or even a gluten-free blend if you’re looking for a gluten-free option. Just keep an eye on the texture!
Can I freeze thumb bars? Yes! Once they’re completely cooled, wrap them tightly in plastic wrap and place them in an airtight container. They can be frozen for up to 2 months. Just thaw them in the fridge before serving.
How do I know when they’re done baking? You’ll know they’re ready when the top is golden brown and a toothpick inserted in the center comes out clean. Trust me, the smell wafting through your kitchen is a good sign, too!
Can I make these thumb bars vegan? You sure can! Substitute the butter with a plant-based alternative and use a flax egg to replace the regular egg if you want to add one. The texture might be slightly different, but they’ll still be delicious!
Serving Suggestions
These traditional thumb bars are delightful on their own, but pairing them with the right accompaniments can take your dessert experience to the next level! I love serving them alongside a steaming cup of tea or freshly brewed coffee—there’s just something cozy about that combo. If you’re feeling a bit indulgent, try adding a scoop of vanilla ice cream or a dollop of whipped cream on the side; the creaminess beautifully complements the fruity jam. You could also serve them with a light fruit salad for a refreshing touch. No matter how you choose to enjoy them, they’re sure to be a hit!
I share easy, flavorful recipes that make home cooking simple, fun, and totally satisfying. Let's get in the kitchen and create something delicious together!


What do you think?
Share your thoughts, tips, or variations on this recipe!